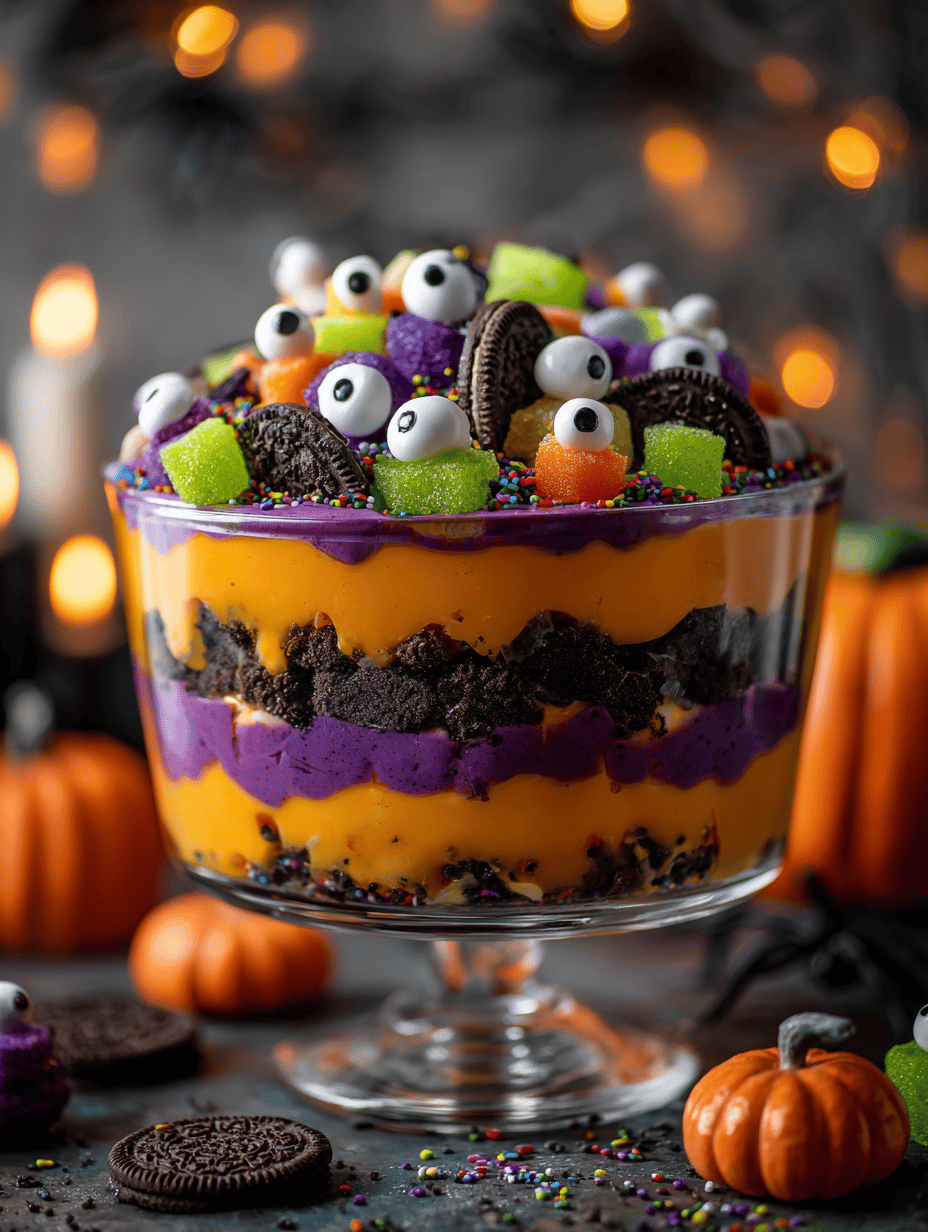
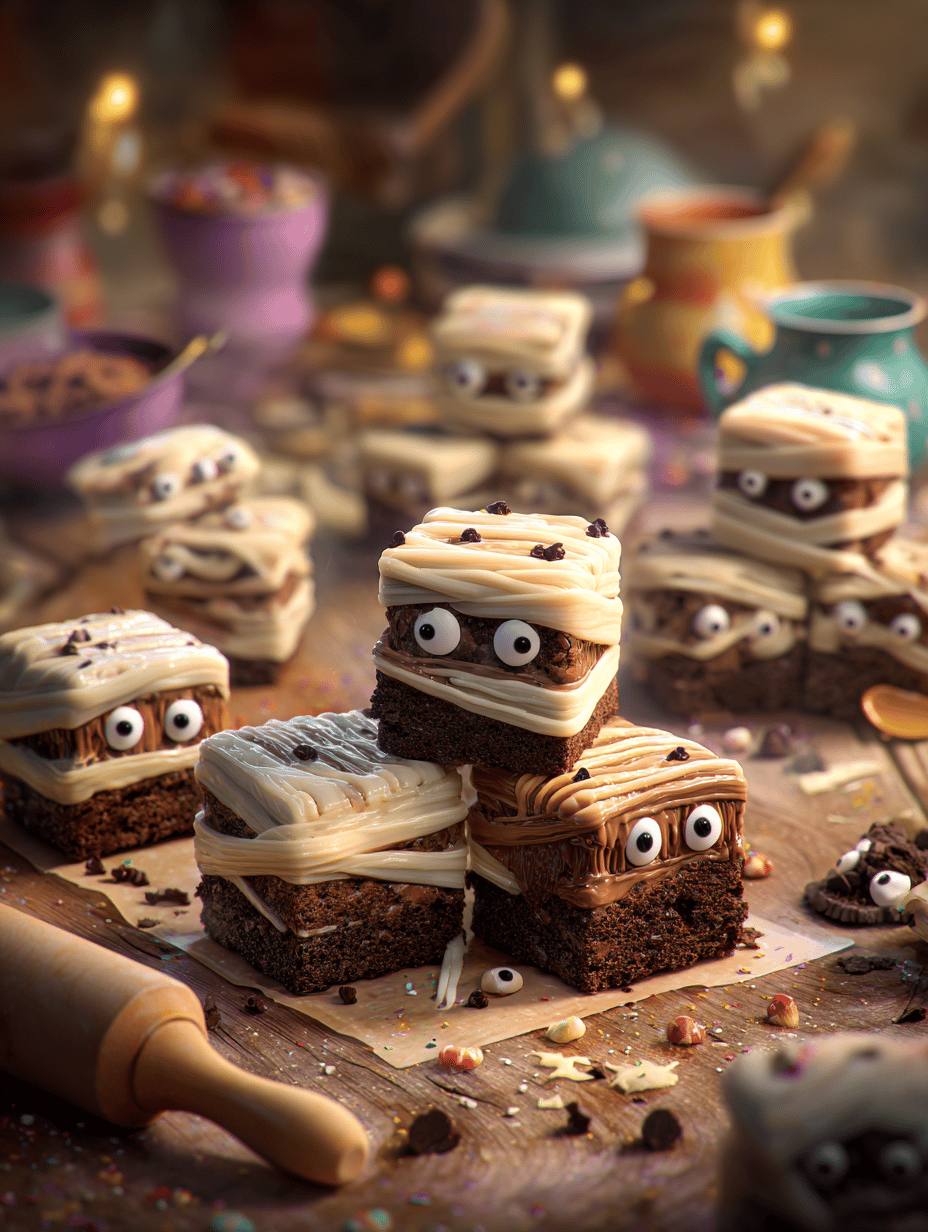
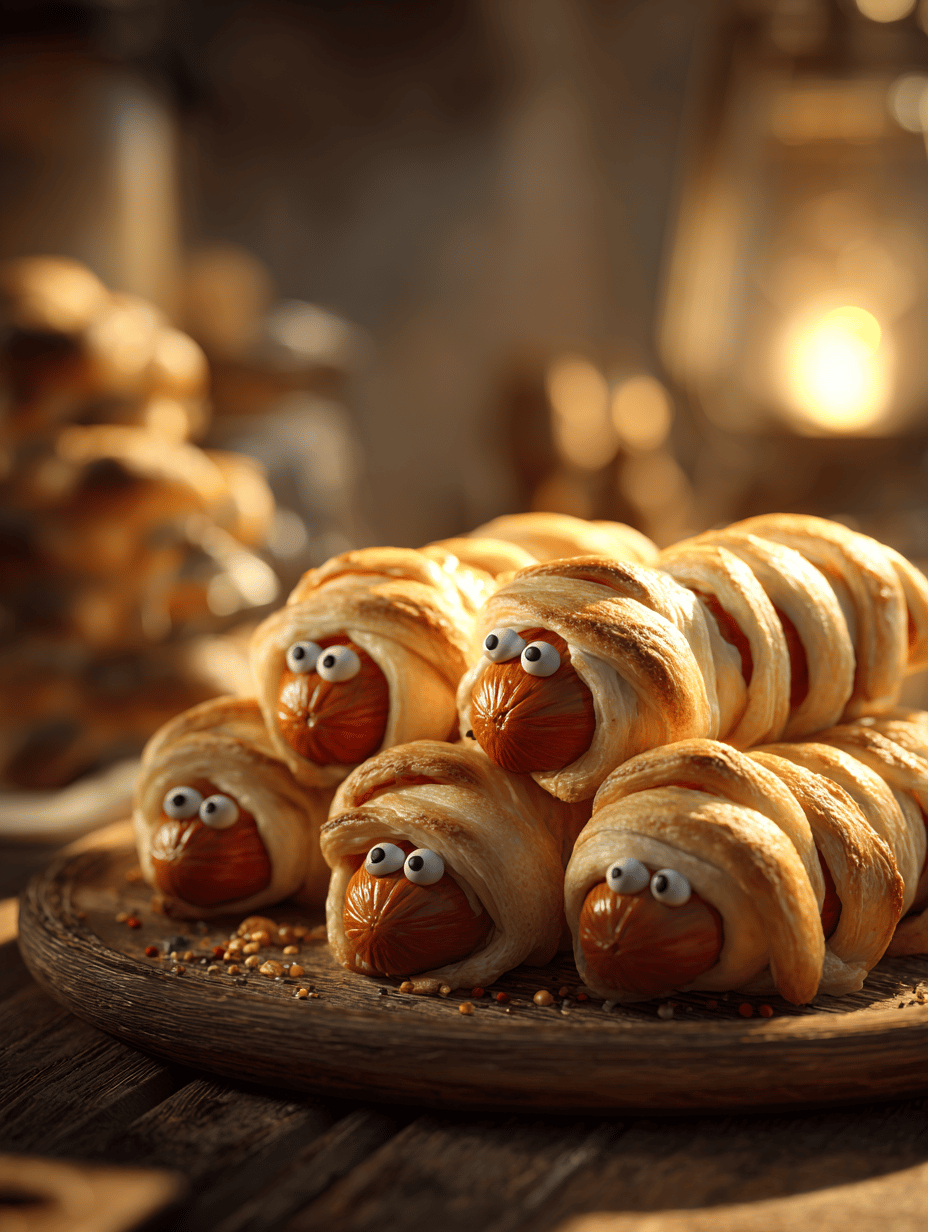
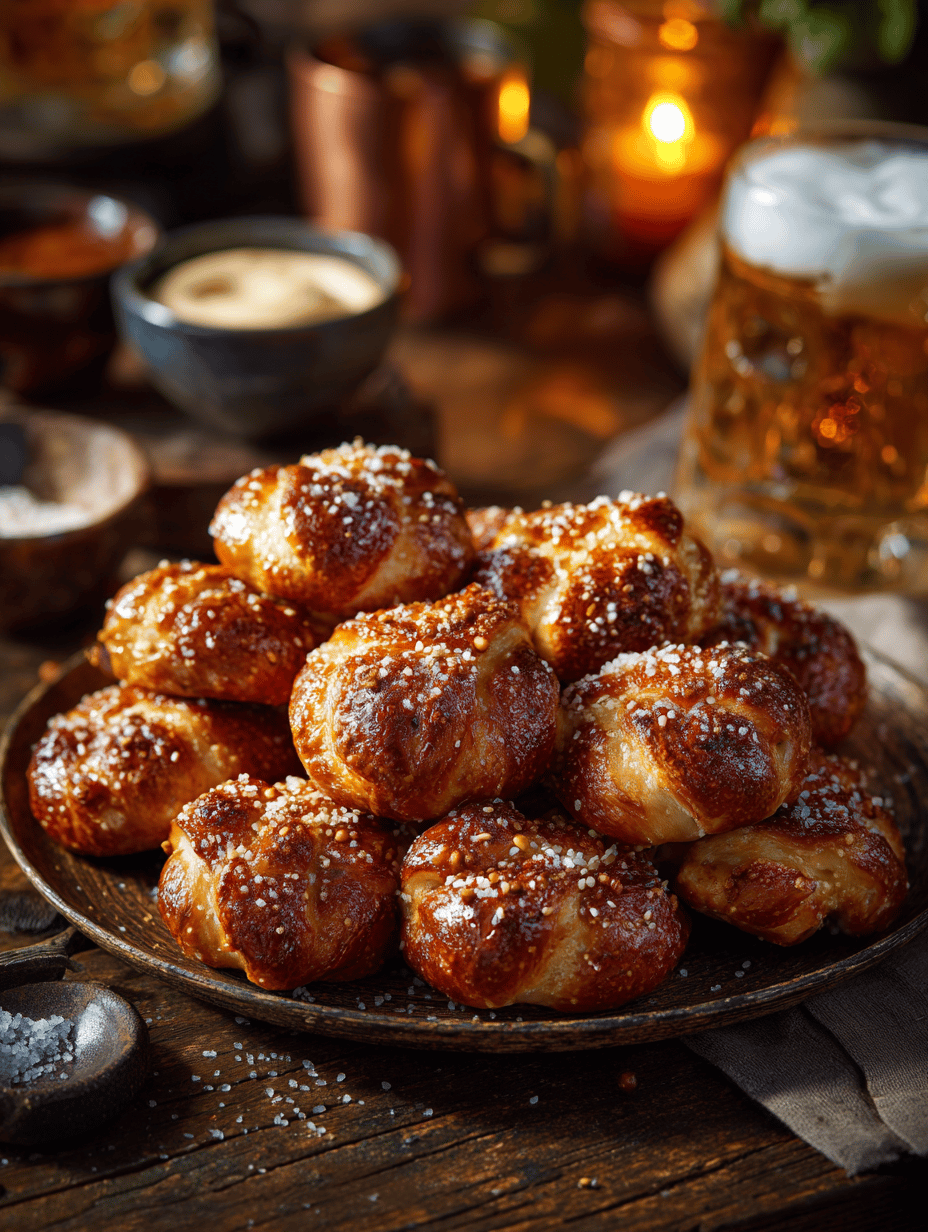
Author: NoahBrooks

  • Unconventional Rum Slushie: A Summer Twist You Never Saw Coming

    Unconventional Rum Slushie: A Summer Twist You Never Saw Coming

    Imagine turning a classic summer drink into a whirlwind of flavors with just one unexpected ingredient. This rum slushie isn’t your average frozen cocktail — it’s infused with a hint of fresh basil and a splash of lime for a fresh, herbaceous twist. Perfect for those who crave a little chaos in their cool-down routine.

    This recipe is a wild card during the heatwave, offering a burst of herbal aroma with every sip. It’s the kind of frozen drink that sparks conversations and surprises even the most loyal beachside patrons. No blender? No problem—just a trusty zip-top bag and a quick freeze, and you’re set for a memorable chill.

    ## WHY I LOVE THIS RECIPE?
    • It’s a playful way to elevate a simple rum drink with fresh herbs, creating complexity.
    • The bright green hue makes it look as vibrant as the flavor inside.
    • I’ve enjoyed the ritual of pinching basil leaves and hearing that satisfying crackle.
    • It’s a spontaneous crowd-pleaser at summer gatherings — chaos included.
    • Nostalgia hits hard with that icy, sweet aroma unmistakably summer.

    ## AVOID MY DISASTER (You’re Welcome)
    • FORGOT to seal the bag tightly, resulting in a salty, icy mess—rinsed and started over.
    • DUMPED too much lime juice, turning the slush into a sour swamp—added ice to balance.
    • OVER-TORCHED the herbs during infusions, leading to bitter hues—re-freshed with fresh basil.
    • MISSED zesting the lime, missing that crucial citrus punch—quickly zested and reapplied.

    ## QUICK FIXES THAT SAVE YOUR DAY
    • When icy texture cracks, splash in a splash of cold water and gently stir.
    • Patch bland flavor by adding a splash more rum and a dash of honey.
    • Shield from freezer burn by storing in an airtight container—crisp texture remains.
    • When herbs get lost, muddle extra basil directly into the slush for peak aromatics.
    • If the slush melts too quickly, serve immediately or refreeze in small portions.

    The simplicity of this herbal rum slushie makes it perfect for spur-of-the-moment parties or solo summer afternoons. Its playful balance of sweetness and herbal freshness captures the essence of warm days with a satisfying chill.

    Every sip offers a tactile mix of icy crunch and fragrant herbs, awakening senses with every cool bite. As the season heats up, this unconventional treat is a reminder that even familiar drinks can surprise us in delightful ways.

    Herbal Rum Slushie

    This herbal rum slushie combines fresh basil and lime with rum, blended into a frozen, icy treat. The mixture has a vibrant green hue and a smooth, granular texture, perfect for hot weather refreshment. It is achieved through freezing and occasional stirring to create a refreshing, herbaceous beverage with a crunchy finish.
    Prep Time 15 minutes
    Total Time 15 minutes
    Servings: 4
    Course: Main Course
    Cuisine: Summer
    Calories: 180

    Ingredients
      

    • 1 cup fresh basil leaves roughly torn
    • 1/2 cup lime juice freshly squeezed
    • 1/4 cup honey optional, for sweetness
    • 3 ounces white rum or light rum
    • 2 cups ice cubes crushed if possible

    Equipment

    • Measuring cups and spoons
    • Zip-top freezer bag
    • Straw or spoon for serving

    Method
     

    1. Combine the torn basil leaves, lime juice, honey, and rum in a small bowl and gently muddle the basil to release its aromatic oils. Let this mixture sit for 5 minutes to infuse the flavors.
    2. Pour the infused lime and basil mixture into a sturdy zip-top freezer bag.
    3. Add the ice cubes directly into the freezer bag with the basil-lime mixture, sealing it tightly to prevent leaks. Shake gently to combine all ingredients evenly.
    4. Place the bag flat in the freezer and freeze for 2-3 hours, shaking the bag every 30 minutes to break up ice crystals and create a slushy texture.
    5. Once the mixture is fully frozen and reaches a consistent slush consistency, remove the bag from the freezer.
    6. Scoop the icy.slush into glasses using a spoon or straw and serve immediately to enjoy the refreshing, herbaceous flavor with a crunchy texture.

    Notes

    For a smoother texture, you can pulse the frozen mixture briefly in a food processor before serving. Adjust the sweetness or herbal intensity by adding more honey or basil as desired.
    Creating this herb-infused rum slushie was my small rebellion against predictable cocktails. It’s a celebration of bold flavors cut through the mundane, perfect for spontaneous summer escapades.

    In a moment of chaos in the kitchen, I rediscovered how simple ingredients can transform into something unexpectedly delightful. It’s these small experiments that bring genuine joy and a little messy magic to warm days.

  • Chill Unusual: The Secret Sauce of Pineapple Coconut Slushies

    Chill Unusual: The Secret Sauce of Pineapple Coconut Slushies

    Few drinks evoke a tropical escape quite like a pi0na colada, but imagining it transformed into a slushie took me by surprise. This isn’t just your average frozen beverage; it0s a nostalgic swirl of pineapple and coconut with a daring icy twist. I discovered that blending frozen fruit with a splash of rum makes everything feel like a spontaneous beach getaway.

    What makes this particular version stand out? It0s the texture, a perfect slush that crunches like fresh snow. Plus, it0s incredibly versatile, easily customizable with dairy-free options or a splash more rum. This recipe turns a simple summer treat into a fun, unexpected party staple. Ideal for library afternoons or sunset hours, it always adds a pop of joyful chaos to my day.

    Pineapple Coconut Piña Colada Slushie

    This frozen beverage combines pineapple and coconut flavors to create a slushie with a crunchy, snow-like texture. Blended with ice and optional rum, it offers a refreshing, icy treat that resembles a tropical paradise in a glass.
    Prep Time 10 minutes
    Total Time 10 minutes
    Servings: 4
    Course: Main Course
    Cuisine: Tropical
    Calories: 150

    Ingredients
      

    • 2 cups frozen pineapple chunks preferably frozen to enhance icy texture
    • 1 cup coconut milk use full-fat for creaminess
    • 1/2 cup white rum optional, for a boozy kick
    • 1 cup ice cubes add more if needed for desired consistency
    • 2 tablespoons sweetened shredded coconut for garnish (optional)

    Equipment

    • Blender
    • Measuring cups and spoons

    Method
     

    1. Add the frozen pineapple chunks, coconut milk, rum (if using), and ice cubes into your blender. Secure the lid firmly.
    2. Blend on high speed until the mixture becomes smooth and icy, with a slushy consistency. This may take 30-60 seconds, depending on your blender.
    3. Stop the blender and check the consistency; if it’s too thick, add a splash more coconut milk and blend briefly to loosen.
    4. Pour the slushie into chilled glasses, showcasing the vibrant pineapple color and frosty texture.
    5. Sprinkle with shredded coconut on top for added texture and visual appeal.
    6. Serve immediately with a straw or small spoon to enjoy the crunchy, snow-like slushie.

    Notes

    Feel free to adjust the amount of rum for a stronger or milder flavor. You can also substitute dairy-free options like almond milk for a vegan version.

    Whether you0re relaxing alone or entertaining friends, this pi0na colada slushie is a cheerful, carefree addition to any occasion. The only question is: are you brave enough to try the extra splash of rum? For me, it’s the perfect way to embrace spontaneous summer vibes, even if it0s just in the middle of winter.

    Now, whenever I see a pineapple or coconut in the grocery aisle, I think: why not turn this into an icy adventure? It0s a small act of rebellion against ordinary drinks. Cheers to the unexpected—frozen, fun, and full of sunshine in every sip.

  • Chill Out with the Unexpected Gatorade Slushie!

    Chill Out with the Unexpected Gatorade Slushie!

    Imagine a sweltering summer day where your most vivid childhood memories come rushing back, all triggered by the scent of cold, fizzy drinks. That’s what makes this Gatorade slushie more than just a refreshing treat; it’s a nostalgic escape with a splash of chaos. I love how it takes the familiar tang of sports drinks and transforms it into icy bliss that’s perfect for spontaneous backyard adventures.

    This recipe is born from the idea that sometimes, the simplest ingredients can deliver the coolest surprises. You don’t need fancy syrups or heavy equipment—just patience and a keen eye to catch the perfect icy moment. It’s the kind of concoction that’s ready in minutes but makes you feel like a summer magician, summoning a frosty delight from your freezer.

    ### WHY I LOVE THIS RECIPE?
    – It’s a joy to turn a regular sports drink into an icy spectacle.
    – Nostalgia hits hard with every slurp, reminding me of childhood games.
    – It’s chaos in a cup—half frozen, half liquid, all fun.
    – Perfect for quick prep during unexpected heatwaves.
    – The vibrant colors and fizz make every sip a party.

    ### AVOID MY DISASTER (You’re Welcome)
    – FORGOT to shake the Gatorade; it’s flat and dull, fix by stirring vigorously.
    – DUMPED over the bowl—spilled in the freezer, now I wait extra hours.
    – OVER-TORCHED the mixture; it turned into a slush that’s too icy, next time, check frequently.
    – SKIPPED the stirring step; large ice chunks didn’t blend well, fix with a quick whisk.

    ### QUICK FIXES THAT SAVE YOUR DAY
    – When mixture freezes too solid, splash some warm water around the edges and stir.
    – If the color loses vibrancy, add a few drops of food coloring for pop.
    – When frost forms unevenly, patch with a quick whirl in the blender.
    – If the gulp tastes flat, simply add a tiny splash of lemon juice.
    – When senses dull, sniff the bowl—sometimes a dash of citrus lifts the flavor.

    The simplicity of this Gatorade slushie makes it perfect for spontaneous summer cravings. Its easy ingredients and quick turnaround let you indulge without fuss. Once you master the art of the icy rush, it’s hard to go back to plain drinks.

    Plus, in a season where hydration often feels dull, this frosty twist keeps the spirit lively. It’s a small spark of joy when a cool beverage feels just right, especially after a dusty afternoon outdoors. The bright fizz and cold rush linger long after the last sip.

    Gatorade Slushie

    This Gatorade slushie is a frozen beverage made by partially freezing sports drinks until they reach a semi-icy, slushy consistency. The main ingredients are flavored Gatorade and ice, which combine to create a refreshingly cold and fizzy treat with a vibrant appearance and granular texture. It’s perfect for quick, nostalgic refreshment on hot summer days.
    Prep Time 5 minutes
    Cook Time 2 hours
    Total Time 2 hours 5 minutes
    Servings: 2
    Course: Main Course
    Cuisine: American
    Calories: 50

    Ingredients
      

    • 1 bottle Gatorade (any flavor) chilled, well-shaken
    • 1 cup ice cubes preferably crushed or small cubes

    Equipment

    • Freezer
    • Mixing spoon

    Method
     

    1. Pour the Gatorade into a shallow, freezer-safe dish, spreading it out evenly.
    2. Place the dish in the freezer and let it freeze for about 1 to 2 hours, checking frequently to prevent over-freezing.
    3. Every 30 minutes, use a fork to scrape and stir the partially frozen Gatorade to create flaky, icy chunks.
    4. When the Gatorade is mostly frozen but still scoopable, add the ice cubes to the mixture.
    5. Stir gently to combine the ice with the semi-frozen Gatorade, creating a slushy, icy consistency with some frozen bits still visible.
    6. Serve the Gatorade slushie immediately in glasses, garnished with a straw or a slice of fruit if desired.

    Notes

    For best results, keep an eye on the freezing process to prevent overfreezing. If it becomes too icy, pop it back in the freezer for a few minutes and stir again. Feel free to experiment with different Gatorade flavors for vibrant variations.
    Hopefully, this guide inspires a new way to enjoy your favorite sports drinks. It’s a simple pleasure that turns ordinary into extraordinary with just a few minutes and a little patience. Keep experimenting—the best recipes happen when you embrace the chaos.

    Take this as your cue to keep that freezer stocked with bubbly Gatorade. It’s more than a drink; it’s a little splash of childhood, a burst of relief on hot days, and an endlessly fun project for all ages.

  • Chilling with a Whiskey Slushie: A Frozen Soul in a Glass

    Chilling with a Whiskey Slushie: A Frozen Soul in a Glass

    Imagine a sultry summer evening, the air thick with the scent of blooming jasmine. You want something more than just a cold drink – you want a burst of bold flavor that sweeps you off your feet. Enter the whiskey slushie, a cunning twist on the classic frozen cocktail, blending icy refreshment with a smoky kick.

    This recipe isn’t just about beating the heat; it’s about turning ordinary moments into miniature celebrations. The moment the icy mixture hits your tongue, you’re greeted with a dance of sweet, bitter, and smoky notes that linger long after your spoon leaves the glass.

    Whiskey Slushie

    The whiskey slushie is a frozen cocktail that combines smoky whiskey with sweet syrup, blended into a smooth, icy mixture. Its textures are both creamy and refreshing, with a vibrant appearance from the icy slush and a golden hue from the whiskey. The final result is a chilled, semi-frozen drink with a bold, layered flavor profile.
    Prep Time 10 minutes
    Total Time 10 minutes
    Servings: 2
    Course: Main Course
    Cuisine: American
    Calories: 250

    Ingredients
      

    • 1 cup whiskey preferably smoky bourbon
    • 1/2 cup simple syrup adjust sweetness to taste
    • 2 cups ice cubes crushed ice preferred for smoother blend

    Equipment

    • Blender
    • Measuring cups and spoons

    Method
     

    1. Measure out one cup of whiskey and pour it into the blender.
    2. Add half a cup of simple syrup to the blender, balancing sweetness with the whiskey’s smoky notes.
    3. Toss in two cups of ice cubes, filling the blender to achieve a thick, icy mixture.
    4. Secure the lid on the blender and pulse a few times to start breaking down the ice.
    5. Blend the mixture on high until the ice is finely crushed and the drink is smooth, about 30-40 seconds, making a thick, slushy consistency.
    6. Check the texture; if desired, add more ice and blend briefly for a firmer slushiness.
    7. Pour the whiskey slushie into chilled glasses, showcasing its icy, semi-frozen appearance with a golden hue.
    8. Optionally, garnish with a twist of lemon or a sprig of mint for visual contrast and aroma.
    9. Serve immediately with a spoon or straw, and enjoy the bold, icy burst of flavor.
    There’s a certain magic in transforming simple ingredients into a sophisticated frozen treat. When you’re craving something both soothing and invigorating, this whiskey slushie delivers in style.

    Enjoy the gentle chill on your lips and the warm glow in your chest as the alcohol warms your senses from the inside out. This recipe is perfect for whispering secrets to friends or savoring alone on a quiet night. It’s a small, cool rebellion against the ordinary, wrapped in a glass.

  • Spooky Sweetness: Crafting the Perfect Halloween Graveyard Pudding Cups

    Spooky Sweetness: Crafting the Perfect Halloween Graveyard Pudding Cups

    Halloween always brings out the nerd in me—especially when I get to obsess over themed treats. This year, I wanted a dessert that blends nostalgia with a splash of spooky flair. Enter the Graveyard Pudding Cups, a fun, eerie project that’s as tasty as it is visually haunting.

    These little cups of chocolate and vanilla combined with creepy edible decorations turn any Halloween gathering into a memorable event. They look complicated but are surprisingly easy, plus they let me unleash my creative chaos in the kitchen. Best of all, they’re perfect for both kids and adults ready to indulge in some spooky sweets.

    Graveyard Pudding Cups

    Graveyard Pudding Cups are layered desserts combining chocolate and vanilla pudding, topped with spooky edible decorations to resemble a creepy graveyard. They are served in individual cups, featuring a smooth, creamy texture with eerie designs for visual impact.
    Prep Time 20 minutes
    Cook Time 10 minutes
    Total Time 30 minutes
    Servings: 6
    Course: Main Course
    Cuisine: American
    Calories: 250

    Ingredients
      

    • 1 pkg chocolate pudding mix for creating a rich, chocolate layer
    • 2 cups milk for preparing the pudding
    • 1 pkg vanilla pudding mix for contrasting layered flavor
    • 2 cups milk for vanilla pudding
    • ½ cup crushed chocolate cookies to mimic dirt on the graveyard
    • optional edible sugar rocks or sprinkles for spooky effect
    • 6 cookie tombstones or spooky decorations for creating graves

    Equipment

    • Mixing bowls
    • Whisk
    • Measuring cups and spoons
    • Cupcake or pudding cups
    • Piping bag (optional)

    Method
     

    1. Prepare the chocolate pudding by whisking the pudding mix with milk until smooth and thickened, about 2-3 minutes. Pour the chocolate pudding into a piping bag or spoon into the bottom of each cup, then chill for 10 minutes until set.
    2. Mix the vanilla pudding powder with milk until well combined and smooth. Once the chocolate layer is partially set, pour or spoon the vanilla pudding over it, smoothing the top gently.
    3. Refrigerate the assembled pudding cups for at least 10 minutes to allow each layer to set firmly.
    4. Sprinkle crushed cookies over the top of the vanilla pudding to resemble dirt, creating a base for your spooky graveyard scene.
    5. Insert cookie tombstones or spooky decorations into the pudding to resemble graves, spacing them evenly for a haunted effect.
    6. Add edible sugar rocks or sprinkles around the tombstones to enhance the eerie, haunted look.
    7. Serve the Graveyard Pudding Cups chilled, with decorations visibly creating a spooky cemetery scene within each cup.

    Notes

    You can customize the decorations with candy bones or use different colored gels for more dramatic effects.
    As the night winds down, the best part is seeing everyone’s smiles when they dig into the graveyard scene. These pudding cups keep the party fun, festive, and just a little bit spooky, making them a highlight of my Halloween table.

    Every spoonful is a quick reminder of childhood trick-or-treating, mixed with a dash of ghoulish delight. It’s these small, whimsical moments that make the holiday special every year, turning simple desserts into stories worth sharing.

  • The Secret Behind the Most Refreshing Blueberry Slushie You’Ve Ever Tasted

    The Secret Behind the Most Refreshing Blueberry Slushie You’Ve Ever Tasted

    Imagine a hot summer day when you stumble upon a secret ingredient that transforms a simple blueberry slushie into an unforgettable icy treat. This recipe isn’t just about blending berries and ice; it’s about capturing a burst of berry sunshine in every sip while sneaking in a hint of lemon zest for that zing. You’ll feel the cool rush hit your palate, leaving behind a sweet and tangy memory.

    What makes this blueberry slushie different? It’s the unexpected splash of basil that elevates the flavor, a twist that sometimes feels more like a flavor revelation than a recipe. Plus, the vibrant purple glow and the fragrant aroma make it irresistible on all senses. Whether for a quick refresh or a stunning presentation, this recipe lasts through every summer craving.

    Blueberry Basil Lemon Slushie

    This blueberry basil lemon slushie is a refreshing icy beverage made by blending fresh blueberries, basil leaves, lemon zest, and ice until smooth. The result is a vibrant purple drink with a balance of sweet, tangy, and herbal flavors, featuring a thick, icy consistency suitable for hot summer days.
    Prep Time 10 minutes
    Total Time 10 minutes
    Servings: 2
    Course: Main Course
    Cuisine: Summer
    Calories: 120

    Ingredients
      

    • 1 cup fresh blueberries washed
    • 1/4 cup fresh basil leaves packed lightly
    • 1 tsp lemon zest from about 1 lemon
    • 2 cups ice cubes
    • 1 tbsp honey optional for added sweetness

    Equipment

    • Blender
    • Measuring cups and spoons

    Method
     

    1. Add the washed blueberries, basil leaves, lemon zest, and honey to the blender.
    2. Pour in the ice cubes and secure the lid tightly.
    3. Blend on high speed until the mixture is smooth and slushy, about 30-60 seconds, with a vibrant purple hue and ice crystals visible.
    4. Taste the slushie and adjust sweetness by adding more honey if desired, then blend briefly to combine.
    5. Pour the slushie into glasses, ensuring a thick, icy texture with bits of blueberries and basil leaves visible.
    6. Garnish each glass with a sprig of basil or a lemon slice if desired, and serve immediately for a refreshing treat.

    Notes

    For a more intense berry flavor, add extra blueberries. Adjust sweetness by varying honey to taste. Best enjoyed immediately while icy and refreshing.
    This blueberry slushie is more than a cold drink — it’s a moment of cool bliss when the heat is relentless. It’s perfect for both spontaneous summer gatherings and quiet afternoons when you need a break from the chaos. The bright burst of berries paired with fresh herbs can turn any day around.

    Keep experimenting with different herbs or adding a splash of sparkling water for extra sparkle. No matter how you tweak it, this recipe is your go-to for a vivid, refreshing escape. It’s a small, sweet celebration of summer in every icy spoonful.

  • Bewitching Blood Moon Vampire Punch: A Spooky Sip with a Surprise

    Bewitching Blood Moon Vampire Punch: A Spooky Sip with a Surprise

    Every October, the air fills with a scent of caramel and crunching leaves. But this year, I wanted to create something that wavers between charm and chaos — a drink that visually screams Halloween and tastes like a daring adventure. Enter my Vampire Punch, garnished with glowing red juice and a hint of mystery in every sip.

    This recipe isn’t just about the flavor; it’s about the story it tells. Guests are captivated by the vivid crimson, feeling like they’ve stepped into a haunted tale with every glass. It’s perfect for midnight gatherings or a mischievous kids’ costume party where everyone gets to be a little spooky.

    Vampire Punch

    Vampire Punch is a vividly red beverage that combines fruit juices and sparkling soda, layered with glowing red gel and garnished with spooky touches. The drink features a striking appearance with a mix of smooth, bubbly, and slightly viscous textures, creating a fun and eerie Halloween centerpiece.
    Prep Time 15 minutes
    Total Time 15 minutes
    Servings: 8
    Course: Main Course
    Cuisine: Halloween
    Calories: 120

    Ingredients
      

    • 2 cups orange juice preferably fresh or from concentrate
    • 1 cup pomegranate juice adds deep red color and fruity flavor
    • 1/2 cup lemon-lime soda for fizziness and sweetness
    • 1 bottle glowing red gel or jelly can be found in specialty stores or online; creates the glowing effect
    • Ice cubes as needed to chill and serve
    • Garnishes of black licorice or edible eyes optional for spooky decoration

    Equipment

    • Large pitcher or mixing bowl
    • Spoon or stirrer
    • Glass serving cups

    Method
     

    1. Pour the orange juice and pomegranate juice into a large pitcher, then stir gently to combine, creating a deep crimson base.
    2. Add ice cubes to the pitcher, filling it about halfway, to chill the mixture quickly and keep it refreshing.
    3. Slowly pour the lemon-lime soda into the pitcher, allowing it to fizz gently and create bubbly layers on top of the juice mixture.
    4. Carefully spoon or pipe the glowing red gel into the center of each glass just before serving, ensuring it stands out as a glowing orb when viewed through the drink.
    5. Pour the chilled punch into glasses, allowing the vibrant red glow to shine through the bubbly liquid, and add extra ice if desired.
    6. Garnish each glass with small pieces of black licorice or edible eyes for a spooky, eerie effect.

    Notes

    Serve immediately to enjoy the glowing effect and fizzy freshness. Optional garnishes enhance the spooky look for Halloween parties.

    My Vampire Punch isn’t just a drink; it’s a potion that sets the mood for creepy, laughter-filled evenings. The bright red color keeps the theme alive—from start to finish, it’s a visual feast.

    Plus, it’s easy to prepare in advance, so I can focus on the spooky decor and creepy costumes. When the clock strikes midnight, and everyone sips their glass, I know the magic of Halloween is truly alive and swirling in every hearty gulp.

  • Spooky Delight: Halloween Monster Eyeball Cake Pops

    Spooky Delight: Halloween Monster Eyeball Cake Pops

    Halloween is the perfect time to embrace chaos in the kitchen, especially with creepy treats like Monster Eyeball Cake Pops. These little horrors are surprisingly easy to make, yet they look terrifyingly adorable. The smell of vanilla and chocolate wafting from your kitchen will turn heads before they even hit the table.

    What I love about these cake pops is how they combine the familiar comfort of cake with a ghoulish twist. Each eyeball oozes with vibrant red jelly and topped with a spicy red candy to mimic bloodshot veins. They’re a fantastic DIY project for both party chaos and nostalgic fun.

    Monster Eyeball Cake Pops

    Monster Eyeball Cake Pops are bite-sized treats made from crumbled cake mixed with frosting, shaped into spheres, and decorated to resemble creepy eyeballs. They feature a smooth cake interior coated with a candy shell and topped with red jelly and bloodshot vein details, creating a fun and spooky dessert with a firm yet tender texture.
    Prep Time 30 minutes
    Cook Time 10 minutes
    Total Time 40 minutes
    Servings: 20
    Course: Main Course
    Cuisine: American
    Calories: 80

    Ingredients
      

    • 1 box store-bought vanilla or chocolate cake (or homemade cake, crumbled) cooled and crumbled into fine crumbs
    • 1/2 cup store-bought frosting to bind the cake crumbs
    • 16 oz white candy melts or coating chocolate to coat the cake balls
    • 1 jar red fruit jelly or jam for the bloodshot eye effect
    • 1 pack red candy or red licorice cut into tiny veins
    • Optional black icing or edible marker to draw tiny pupils on the eyeballs
    • as needed lollipop sticks for inserting into the cake balls

    Equipment

    • Mixing bowls
    • Baking sheet
    • Cooling rack
    • Candy thermometer
    • Lollipop sticks
    • Microwave or double boiler
    • Piping bag or plastic sandwich bag
    • Small fine-tip piping brushes

    Method
     

    1. Crumble the cooled cake into fine crumbs in a large bowl, then add the frosting and mix until well combined and the mixture sticks together when pressed.
    2. Shape the mixture into 1-inch round balls using your hands, then place them on a baking sheet lined with parchment paper. Insert a lollipop stick into each ball, pressing gently to secure.
    3. Freeze the cake pops for about 15-20 minutes until firm, which helps them coat smoothly later.
    4. While they chill, melt the candy melts in a microwave-safe bowl or double boiler until smooth and tempers to about 110°F (43°C).
    5. Remove the cake pops from the freezer and dip each one into the melted candy, swirling gently to cover completely. Let any excess drip off before placing back on the parchment.
    6. Allow the coated cake pops to set at room temperature or in a cool place until the coating is hard and shiny.
    7. Using a small spoon or piping bag, add a generous dab of red jelly on top of the cake ball to resemble an eyeball’s bloodshot center.
    8. Use tiny pieces of red licorice or candy veins to spread around the jelly to mimic bloodshot veins radiating from the center.
    9. Optionally, draw a tiny black pupil onto the jelly with an edible marker or black icing to give the eyeball more expression.
    10. Once decorated, place the monster eyeballs in a cool spot for a few minutes to ensure everything sets firmly.
    11. Enjoy your spooky, creepy monster eye cake pops—perfect for Halloween parties or themed festivities!

    This recipe taps into the playful spirit of Halloween, making it perfect for parties or a spooky movie night. The bright colors and unexpected textures instantly lift the mood and spark conversation around your table. It’s a reminder that some of the best memories come from getting a little messy in the kitchen.

    As you pack these Monster Eyeball Cake Pops into goody bags or display them on a platter, they become part of the season’s magic. The surprise of biting into one, with its chewy cake and gooey center, will leave everyone talking long after October. Enjoy creating and sharing these creepy, delicious treats with loved ones.

  • Autumn Dawn: Pumpkin Spice Overnight Oats That Rekindle Cozy Mornings

    Autumn Dawn: Pumpkin Spice Overnight Oats That Rekindle Cozy Mornings

    Imagine waking up to the smell of roasted pumpkin and warm spices wafting through your home. This isnt just a morning routine; its a small celebration of falls gentle arrival, captured in a jar. Pumpkin Spice Overnight Oats bring a nostalgic twist to breakfast, blending simplicity with seasonal flair that feels both comforting and surprisingly exciting.

    What makes these oats so special? Its the quiet magic of preparing them the night before, allowing the flavors to meld and deepen overnight. In the morning, all thats left is to stir, add a dash of cream, and enjoy. Its a nourishing start that whispers of cozy sweaters, crisp air, and pumpkin patches.

    The best part? You can customize them endlessly—add crunch with toasted nuts, sweetness with maple syrup, or a tang with Greek yogurt. This recipe isnt just nutrition; its a ritual that whispers slow mornings and sweetly scented days ahead.

    Pumpkin Spice Overnight Oats

    This dish combines rolled oats soaked in a mixture of pumpkin purée, warm spices, and milk, creating a creamy and flavorful breakfast that develops depth overnight. The final texture is thick, smooth, and slightly hearty, topped with optional garnishes for added crunch and sweetness.
    Prep Time 10 minutes
    Total Time 10 minutes
    Servings: 2
    Course: Main Course
    Cuisine: American
    Calories: 250

    Ingredients
      

    • 1 cup rolled oats old-fashioned preferred
    • ½ cup pumpkin purée canned or homemade
    • 1 cup milk dairy or plant-based
    • 1 tablespoon maple syrup optional for sweetness
    • 1 teapoon cinnamon
    • ½ teaspoon nutmeg
    • ¼ teaspoon cloves ground
    • 1 dash vanilla extract
    • Pinch salt

    Equipment

    • Mixing bowl
    • Measuring cups and spoons
    • Spoon or whisk
    • Jar or container with lid

    Method
     

    1. Combine the oats, pumpkin purée, milk, maple syrup, cinnamon, nutmeg, cloves, vanilla extract, and salt in a mixing bowl. Stir thoroughly until the mixture is smooth and well blended, with no visible lumps.
    2. Pour the mixture into a jar or container with a lid, ensuring it’s filled to a manageable level for easy stirring later.
    3. Seal the jar tightly and place it in the refrigerator overnight, allowing the oats to soak up the flavors and soften.
    4. The next morning, remove the jar from the fridge and give the oats a good stir, enhancing the creamy, thick consistency. The oats should be tender and well-coated with the pumpkin-spiced mixture.
    5. Optionally, add toppings such as chopped nuts, a drizzle of honey, or a dollop of Greek yogurt for extra flavor and texture.
    6. Enjoy your pumpkin spice overnight oats as a comforting and flavorful breakfast, with a spoonful of toppings if desired.

    Notes

    For a creamier texture, try blending the pumpkin and milk before mixing with oats. Adjust sweetness and spices to taste.

    This Pumpkin Spice Overnight Oats recipe is more than just a breakfast; its a seasonal embrace that turns early mornings into moments of comfort. As the leaves turn and temperatures dip, this dish offers a warm, hearty start that aligns perfectly with falls embrace. Its a reminder to slow down and enjoy simple pleasures with every spoonful.

    Whether you prepare it on busy weekdays or lazy weekends, it always feels like a small celebration of seasonal bounty. Enjoy the soft, creamy oats, the burst of pumpkin aroma, and the cozy spices that turn an ordinary morning into something memorable. Sometimes, the simplest recipes make the biggest daily magic.

  • Morning Magic: Pumpkin Oatmeal That Transforms Your Day

    Morning Magic: Pumpkin Oatmeal That Transforms Your Day

    As chilly mornings start to creep in, I find myself craving something that warms both the hands and the soul—something that isn’t just comfort but a little bit of joy in every spoonful. Enter my pumpkin oatmeal, a recipe inspired by pumpkin patches and mountain mornings, but with a cozy twist that sneaks into your breakfast routine. Its rich aroma, blended with cinnamon and a hint of nutmeg, fills the entire kitchen, pulling everyone towards the table.

    This isn’t your average warm bowl. The secret is in the texture: perfectly creamy oats swimming in a spiced pumpkin broth, with just enough sweetness to tame the morning rush. Each bite delivers a gentle burst of fall flavors, making even the busiest mornings feel a bit more special. It’s a simple fix for a quick, nourishing start—plus, leftovers reheat beautifully, making mornings easier and tastier.

    Pumpkin Spiced Oatmeal

    This pumpkin spiced oatmeal combines rolled oats cooked in a creamy pumpkin broth infused with cinnamon and nutmeg, creating a warm and hearty breakfast. The dish has a smooth, velvety texture with a speckled appearance from the spices and pumpkin puree, making it both visually inviting and comforting to eat.
    Prep Time 5 minutes
    Cook Time 15 minutes
    Total Time 20 minutes
    Servings: 4
    Course: Main Course
    Cuisine: American
    Calories: 220

    Ingredients
      

    • 1 cup rolled oats old-fashioned preferred
    • 2 cups milk dairy or non-dairy
    • 1/2 cup canned pumpkin preferably pure pumpkin puree
    • 1 teaspoon cinnamon
    • 1/4 teaspoon nutmeg
    • 2 tablespoons maple syrup or honey, optional for added sweetness

    Equipment

    • Medium saucepan
    • Wooden spoon or spatula
    • Measuring cups and spoons
    • Knife
    • Cutting board

    Method
     

    1. Combine the milk, pumpkin puree, cinnamon, and nutmeg in a medium saucepan. Bring the mixture to a gentle simmer over medium heat, stirring occasionally until warmed through and fragrant.
    2. Add the rolled oats to the simmering pumpkin mixture. Stir well to combine, ensuring the oats are fully submerged.
    3. Reduce the heat to low and cook, stirring frequently, until the oats have absorbed most of the liquid and the mixture thickens to a creamy consistency, about 10 minutes.
    4. Stir in the maple syrup for sweetness and adjust the spices if needed. Continue cooking for another 1-2 minutes to meld flavors.
    5. Remove from heat and let sit for a minute to thicken further. The oatmeal should be velvety and slightly glossy.
    6. Divide the pumpkin oatmeal into bowls and serve hot, garnished with a sprinkle of extra cinnamon or a dollop of yogurt if desired.

    Notes

    For a creamier texture, blend some cooked oats directly into the pumpkin mixture before serving. Leftovers can be refrigerated and reheated, adding a splash of milk to loosen the consistency.

    Whether you’re savoring this on a lazy weekend or rushing out the door, pumpkin oatmeal adds a touch of seasonal magic that’s hard to beat. It’s quick to make, endlessly adaptable, and always comforting—like a warm blanket in bowl form. The best part? It’s a small, satisfying way to bring that harvest feeling into your everyday life.

    As the leaves turn and the air crisps up, this recipe becomes my go-to. It’s a gentle reminder that beauty and joy can be simple—especially when crafted with love and a dash of pumpkin spice. No matter how hectic the morning, this bowl offers a calm, sweet moment before the day begins.