Category: Main Course

  • A Cozy Twist on White Chicken Chili You Can’t Resist

    A Cozy Twist on White Chicken Chili You Can’t Resist

    White chicken chili often feels like a secret handshake among comfort food fans, but I’ve discovered a way to make it even more inviting. This recipe uses a hint of cumin and a splash of lime that transform the familiar into a vibrant bowl of warmth. It’s perfect for those days when you crave something hearty yet surprisingly fresh.

    What makes this version stand out is the subtle layer of toasted garlic that crackles as it cooks, adding depth to every spoonful. Plus, it’s a one-pot wonder that fills the kitchen with a smoky aroma. The best part? It comes together in under 30 minutes, making it the ultimate go-to for busy nights.

    Imagine pulling this creamy, spicy dish out of the pot, smelling the inviting blend of herbs and spices. It’s a comforting choice that reminds me of family dinners and lazy weekends, the kind where everyone gathers around with bowls in hand. With each bite, the chili offers a harmonious balance of heat, richness, and a squeeze of fresh lime that keeps you coming back for more.

    White Chicken Chili

    White chicken chili is a hearty comfort food featuring tender chicken, white beans, and aromatic spices simmered until creamy. The dish has a slightly chunky, thick consistency with a vibrant appearance from lime juice and herbs, topped with crispy toasted garlic.
    Prep Time 10 minutes
    Cook Time 20 minutes
    Total Time 30 minutes
    Servings: 4
    Course: Main Course
    Cuisine: American
    Calories: 350

    Ingredients
      

    • 1 lb boneless, skinless chicken breasts
    • 2 cups white beans cooked or canned, drained and rinsed
    • 1 medium onion diced
    • 3 cloves garlic minced
    • 1 teaspoon ground cumin
    • 4 cups chicken broth
    • 2 tablespoons olive oil
    • 1 lime lime juiced
    • 2 cloves toasted garlic sliced thin and toasted until fragrant

    Equipment

    • Large pot or Dutch oven
    • Mixing spoon

    Method
     

    1. Heat the olive oil in a large pot over medium heat. Add the diced onion and cook until it becomes translucent and soft, about 5 minutes, while fragrant aromas fill the kitchen.
    2. Add the minced garlic and cook for another minute, stirring constantly until fragrant and slightly golden, which enhances its aroma and flavor.
    3. Place the chicken breasts in the pot and pour in the chicken broth, bringing everything to a gentle simmer. Cover the pot and cook for about 10 minutes until the chicken is cooked through and tender.
    4. Remove the chicken from the pot and shred it using two forks, then return the shredded chicken to the pot and stir in the cumin and white beans, allowing the flavors to meld while the chili heats through for another 5 minutes.
    5. Squeeze fresh lime juice into the chili, stirring well to add brightness and a touch of acidity that balances the richness of the dish.
    6. Toast thin slices of garlic in a dry skillet over medium heat until golden and fragrant, then sprinkle over the chili for added crunch and deep flavor.
    7. Serve the chili hot, topped with crispy toasted garlic and garnished with fresh herbs if desired. The chili will be thick, creamy, and bursting with aromatic herbs and spices, perfect for a cozy meal.

    This white chicken chili is a reminder that simple ingredients can create big flavors. It’s a dish that adapts easily, with options to add your favorite extras or keep it straightforward. The balance of spice and creaminess makes it a versatile favorite for any season.

    Whenever I make this, I appreciate how a few pantry staples come together in a burst of comforting aroma. It’s a meal that resonates with cozy nights and can even be whipped up as a spontaneous treat. In a world of hectic schedules, this chili provides a moment of peace and hearty satisfaction.

  • The Secret Sauce for an Unforgettable Eggplant Parmesan Experience

    The Secret Sauce for an Unforgettable Eggplant Parmesan Experience

    Eggplant Parmesan isn’t just comfort food; it’s a nostalgic dance on your taste buds. But what if I told you that the secret to elevating this classic lies in a surprising twist? I recently experimented with a dash of smoked paprika and a sprinkle of roasted garlic, transforming this humble dish into a smoky, savory masterpiece.

    When I make Eggplant Parmesan, I notice the kitchen fills with a warm, cheesy aroma that feels like a cozy hug on a rainy day. The crispy, golden eggplant slices combined with gooey cheese create a texture contrast that’s utterly satisfying. This recipe is also a perfect way to enjoy a plant-based meal that’s packed with flavor and heart.

    What makes this version stand out is the balance between tradition and innovation. It’s ideal for those craving comfort but also eager to explore new flavor layers in their cooking. Whether you’re new to eggplant or a seasoned veggie enthusiast, this dish promises a delightful experience every time.

    Smoky Eggplant Parmesan

    This version of Eggplant Parmesan involves slicing and breading eggplant, which is then baked until crispy and layered with a smoky tomato sauce, melted cheese, and roasted garlic. The final dish has a golden-brown crust with gooey, cheesy layers and a tender interior, showcasing a balance of textures and rich flavors.
    Prep Time 30 minutes
    Cook Time 40 minutes
    Total Time 1 hour 10 minutes
    Servings: 4
    Course: Main Course
    Cuisine: Italian-inspired
    Calories: 350

    Ingredients
      

    • 2 medium eggplants sliced into 1/4 inch rounds
    • 1 cup bread crumbs for coating
    • 1/2 cup parmesan cheese grated
    • 2 cups mozzarella cheese shredded
    • 4 cloves garlic roasted
    • 2 cups tomato sauce preferably smoky-flavored
    • 3 tbsp olive oil divided
    • 1 tsp smoked paprika for flavor and color
    • 1 pinch salt
    • 1 pinch black pepper

    Equipment

    • Baking sheet
    • Large skillet

    Method
     

    1. Preheat your oven to 400°F (200°C). Slice the eggplants into 1/4 inch rounds and set aside. Roast the garlic cloves in the oven wrapped in foil until soft and fragrant, about 20 minutes.
    2. In a small bowl, mix bread crumbs, grated Parmesan, smoked paprika, salt, and pepper. This will be your seasoned coating mixture.
    3. Brush the eggplant slices with 1 tablespoon of olive oil on both sides. Dip each slice into the seasoned bread crumb mixture, pressing gently to adhere and creating a crispy coating.
    4. Arrange the coated eggplant slices on a baking sheet lined with parchment paper. Bake for about 20 minutes until golden brown and crispy around the edges.
    5. Meanwhile, chop the roasted garlic and stir it into the tomato sauce for a smoky, garlicky flavor. Warm the sauce gently on the stove until heated through.
    6. Once the eggplant slices are done, start assembling the dish in a baking dish or oven-safe casserole. Spread a layer of tomato sauce on the bottom, then add a layer of eggplant slices. Repeat with sauce and eggplant, finishing with a layer of sauce on top.
    7. Sprinkle the shredded mozzarella evenly over the top layer of sauce, then add the remaining Parmesan cheese for extra flavor.
    8. Bake the assembled eggplant Parmesan in the oven for 20-25 minutes, until the cheese is bubbling and golden brown on top.
    9. Remove from the oven and let rest for 5 minutes to allow the layers to set. Serve hot, garnished with fresh herbs if desired.

    Eggplant Parmesan is a dish that brings people together, whether for a family dinner or a quiet night in. Its rich flavors and crispy textures make it a timeless choice that adapts easily to any season or occasion. This version, with its smoky, cheesy twist, aims to inspire your home-cooking adventures.

    Enjoy the process as much as the plate. This recipe reminds us that a little creativity and a pinch of patience can turn simple ingredients into something truly special. So go ahead, indulge in a slice of this golden, cheesy goodness—your taste buds will thank you.

  • Halloween Bat Wings: The Spooky Soy Sauce Chicken Delight

    Halloween Bat Wings: The Spooky Soy Sauce Chicken Delight

    Every October, I find myself craving something that combines the festive thrill of Halloween with bold, unexpected flavors. These Halloween Bat Wings are not your average chicken wing—they’re shaped like tiny bats, ready to roost on your platter. The secret? A savory soy sauce marinade that gives them a shiny, dark glaze perfect for any spooky spread.

    Crafting these bat-shaped wings is an adventure in itself. The aroma of soy, garlic, and a hint of ginger will greet you as they bake, filling your kitchen with a nostalgic warmth. They’re great for parties, but I love making them just for a little fun and a break from the usual.

    WHY I LOVE THIS RECIPE?

    • It sparks childhood memories of Halloween costumes and spooky stories.
    • The crispy skin paired with umami-rich marinade creates a perfect bite.
    • Seeing the bats come to life in the oven makes me feel like a kitchen wizard.
    • They are surprisingly simple to prepare, with a big visual impact.
    • The dark soy glaze cracks and shimmers in the light, adding to the eerie vibe.

    AVOID MY DISASTER (You’re Welcome)

    • FORGOT to cut the wings properly? They won’t take the shape. Cut carefully before baking.
    • DUMPED too much marinade? The wings will be soggy. Use a light coat for crispness.
    • OVER-TORCHED the edges? They’ll turn black fast. Keep an eye on your oven temp.
    • FORGOT to pat the wings dry? The marinade won’t stick well. Pat them dry first.

    QUICK FIXES THAT SAVE YOUR DAY

    • When wings stick, splash a little oil on the baking sheet before placement.
    • Patch soggy wings by broiling for 2 minutes—crisp up that glaze.
    • Shield delicate wings from burning with foil tenders—easy rescue.
    • Forgot to marinate? Skip ahead—brush on soy glaze mid-baking for flavor.
    • When in doubt, add a splash of sesame oil for extra aroma and shine.

    Halloween Bat Wings

    Halloween Bat Wings are shaped chicken wings marinated in a savory soy sauce mixture, then baked until crispy with a shiny, dark glaze. The wings are cut and formed into small bat shapes, creating an eye-catching and flavorful appetizer with a crispy exterior and tender interior. They are perfect for spooky celebrations and party spreads.
    Prep Time 20 minutes
    Cook Time 30 minutes
    Total Time 50 minutes
    Servings: 4
    Course: Main Course
    Cuisine: American
    Calories: 250

    Ingredients
      

    • 2 lbs chicken wings preferably drumettes and flats for easier shaping
    • 1/4 cup soy sauce for marinade and glaze
    • 2 cloves garlic minced
    • 1 teaspoon fresh ginger grated
    • 1 tablespoon honey for slight sweetness
    • 1 teaspoon sesame oil optional, for aroma and shine
    • to taste salt and pepper for seasoning

    Equipment

    • Baking sheet
    • Sharp knife

    Method
     

    1. Pat the chicken wings dry with paper towels to ensure they’ll marinate and crisp up properly in the oven.
    2. Mix soy sauce, minced garlic, grated ginger, honey, and sesame oil in a bowl to create a savory marinade and glaze. Whisk until well combined.
    3. Place the chicken wings in a large bowl or zip-top bag and pour in the marinade. Toss well to coat all pieces evenly. Let them marinate in the refrigerator for at least 15 minutes or up to 1 hour for more flavor.
    4. Preheat your oven to 400°F (200°C). Line a baking sheet with parchment paper or lightly spray with cooking spray to prevent sticking.
    5. Arrange the marinated wings on the prepared baking sheet in a single layer, leaving a little space between each piece for even cooking.
    6. Bake the wings for 25-30 minutes, flipping halfway through, until the skin is crispy and browned, and the glaze is bubbling and shiny. Keep an eye on them near the end to prevent burning.
    7. While the wings bake, prepare a small knife and cutting board. Once out of the oven, let the wings cool slightly so they can be shaped.
    8. To shape the bat wings, carefully cut each chicken wing into two parts: the drumette and the flat. Use the knife to carve minor notches to resemble tiny bat wings at the ends of the flats.
    9. Using the cut pieces, assemble small bat shapes by attaching the wings with a little leftover marinade or toothpicks for support if needed. The wings should resemble mini bats with outstretched wings.
    10. Serve the bat-shaped wings on a platter, drizzle with any remaining glaze, and garnish with sliced green onions or sesame seeds if desired for extra flair.

    Notes

    For extra crunch, broil the assembled bat wings for 2 minutes at the end of baking. Use toothpicks carefully and remove before serving.

    These Halloween Bat Wings are a fun and flavorful way to celebrate the spooky season. The crispy skin, dark glaze, and bat shapes make them a hit at any gathering or quiet night in. They remind me that food can be playful and beautiful, even in the chaos of holiday prep.

    Every time I make these, I rediscover the joy of turning simple ingredients into a little piece of Halloween magic. Whether you’re serving these for a party or just craving something whimsical, they’re sure to delight. In the end, it’s all about the messy joy of creating something memorable from everyday pantry staples.

    }

  • Lazy Cook’s Ultimate Lasagna Soup Trick

    Lazy Cook’s Ultimate Lasagna Soup Trick

    Imagine coming home after a long day, craving comfort but lacking the time to layer a real lasagna. This soup transforms the familiar flavors into a quick, one-pot marvel that captures all that cheesy goodness in every spoonful. The best part? No boiling water for noodles or waiting through long bake times.

    This recipe is perfect for anyone who loves robust tomato aroma, melted cheese dripping from every bite, and the slight crunch of fresh herbs. It’s a lazy girl’s shortcut that doesn’t skimp on flavor, just clever use of pantry ingredients and a little bit of love. Who says cozy meals need hours to prepare?

    Cheesy Tomato Soup with Pasta

    This dish is a creamy, hearty tomato-based soup enriched with melted cheese and cooked pasta, served in a single pot for easy preparation. The soup is thick and smooth with a slightly chunky texture from the pasta and herbs, making it a comforting and filling meal.
    Prep Time 10 minutes
    Cook Time 20 minutes
    Total Time 30 minutes
    Servings: 4
    Course: Main Course
    Cuisine: American
    Calories: 320

    Ingredients
      

    • 1 tablespoon olive oil
    • 1 small onion finely chopped
    • 2 cloves garlic minced
    • 1 can (14 oz) crushed tomatoes
    • 2 cups vegetable broth
    • 1 cup pasta small shapes like ditalini or shells
    • 1 cup shredded cheese cheddar or mozzarella
    • to taste salt and pepper
    • 2 tablespoons fresh fresh basil chopped, optional garnish

    Equipment

    • Large saucepan
    • Wooden spoon

    Method
     

    1. Heat olive oil in a large saucepan over medium heat until shimmering. Add the finely chopped onion and cook, stirring occasionally, until translucent and soft, about 5 minutes.
    2. Stir in the minced garlic and cook for another minute until fragrant; you should smell a warm, aromatic aroma filling the air.
    3. Pour in the crushed tomatoes along with their juices and stir well, allowing the mixture to bubble gently and thicken slightly, about 3 minutes.
    4. Add the vegetable broth to the saucepan, stir, and bring the soup to a gentle boil.
    5. Once boiling, stir in the pasta, reduce the heat to medium-low, and cook uncovered, stirring occasionally, until the pasta is tender and the soup has thickened, about 10 minutes.
    6. Stir in the shredded cheese until melted and the soup appears creamy and smooth, about 2-3 minutes.
    7. Season with salt and pepper to taste, and sprinkle chopped fresh basil for brightness.
    8. Serve hot in bowls, garnished with extra basil if desired, for a comforting, cheesy tomato soup with pasta.

    This lasagna soup is more than just a meal; it’s a reminder that comfort food can be quick and customizable. The layers of flavors and textures make each bowl a little celebration of simplicity and flavor. It’s perfect for busy nights or when you need that nostalgic hit of home.

    With this recipe, you’ll master the art of transforming ordinary ingredients into something memorable. No matter the season, the aroma and taste will keep you coming back for more. Sometimes, the best dishes are the ones made with a little chaos and a lot of heart.

  • Unconventional Stuffed Peppers: A Flavor Fuse

    Unconventional Stuffed Peppers: A Flavor Fuse

    Imagine biting into a roasted bell pepper, tender and sweet, yet bursting with unexpected flavors from an exotic stuffing. Today, we aren’t just talking your standard stuffed peppers; we’re exploring a fusion of spices and ingredients that wake up your taste buds.

    This recipe takes a familiar comfort food and turns it into an adventure — perfect for those who crave something different but still crave hearty comfort. With a blend of global flavors and a twist on tradition, these stuffed peppers become a centerpiece that sparks curiosity at any table.

    Understanding the power of aromatic spices and contrasting textures can change how you see simple ingredients. Plus, this dish is versatile enough to adapt to what’s lurking in your pantry—no special trips needed!

    Exotic Stuffed Roasted Bell Peppers

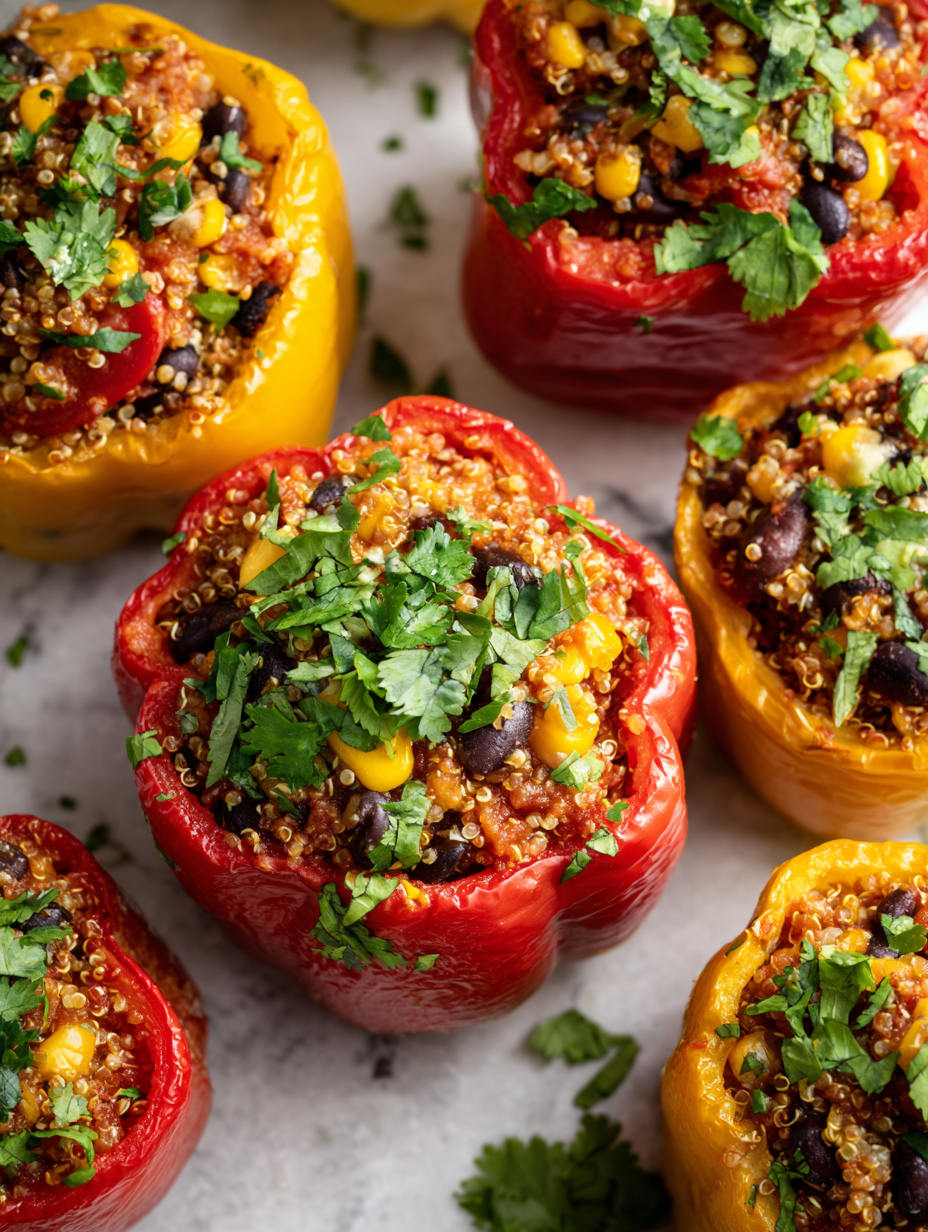
    This dish features bell peppers that are halved and roasted until tender, then filled with a spiced, flavorful stuffing made from rice, herbs, and aromatic spices. The peppers are baked again until the filling is heated through and slightly browned on top, resulting in a colorful, hearty, and visually appealing entrée with a balance of softness and slight caramelization.
    Prep Time 15 minutes
    Cook Time 40 minutes
    Total Time 55 minutes
    Servings: 4
    Course: Main Course
    Cuisine: Fusion
    Calories: 250

    Ingredients
      

    • 4 bell peppers halved and pitted
    • 1 cup cooked rice preferably jasmine or basmati
    • 1/2 cup chopped herbs parsley, cilantro, or basil mix
    • 1 teaspoon smoked paprika
    • 1/2 teaspoon cumin
    • 2 cloves garlic minced
    • 2 tablespoons olive oil
    • to taste salt and pepper
    • 1/4 cup crumbled feta cheese optional for added richness

    Equipment

    • Baking sheet
    • Mixing bowls
    • Skillet
    • Spoon
    • Knife
    • Cutting board

    Method
     

    1. Preheat your oven to 400°F (200°C). Line a baking sheet with parchment paper or lightly oil it.
    2. Cut the bell peppers in half lengthwise and remove the seeds and membranes. Arrange them cut side up on the prepared baking sheet.
    3. Drizzle the peppers with a bit of olive oil and roast them in the oven for about 20-25 minutes, until they are slightly softened and the skin begins to wrinkle. Remove and let cool slightly.
    4. While the peppers roast, heat a tablespoon of olive oil in a skillet over medium heat. Add the minced garlic and cook until fragrant, about 30 seconds.
    5. Add the cooked rice, smoked paprika, cumin, salt, and pepper to the skillet. Stir well and cook for 2-3 minutes, allowing the flavors to meld. Remove from heat.
    6. Stir in the chopped herbs and crumbled feta cheese (if using) into the rice mixture. Mix thoroughly to incorporate all flavors.
    7. Stuff each roasted pepper half with the rice filling, pressing lightly to pack the filling into the cavity.
    8. Return the stuffed peppers to the oven and bake for an additional 10-15 minutes, until the filling is heated through and slightly browned on top.
    9. Remove from the oven and let the peppers rest for a few minutes. Serve warm, garnished with extra herbs if desired.

    Notes

    Feel free to customize the filling with other vegetables or proteins like chickpeas or ground meat for added variety.

    Making these stuffed peppers is about embracing a bit of boldness in your cooking. They’re great for a cozy dinner or impressing guests with minimal fuss but maximum flavor.

    Enjoying this dish reminds me that sometimes, taking a small culinary risk pays off in the most delightful way, turning everyday ingredients into something memorable. As the peppers char slightly on top, that spicy, smoky aroma reassures you that simple can be spectacular.

  • Unveiling the Cozy Charm of Taco Soup: A Flavorful Night in a Bowl

    Unveiling the Cozy Charm of Taco Soup: A Flavorful Night in a Bowl

    Imagine a chilly evening, the kind where you long for comfort without the fuss. Taco Soup is your go-to, with its inviting aroma of spices and sizzling beef that fills the kitchen. It’s not just a meal; it’s a warm hug after a long day, perfect for sharing.

    This recipe transforms simple pantry staples into a vibrant, hearty dish that feels like a fiesta in every spoonful. Its flexibility allows for personal touches—extra cheese, hotter peppers, or a dash of lime to brighten the flavors. Taco Soup is a crowd-pleaser that turns any dinner into a celebration.

    Taco Soup

    Taco Soup is a hearty, flavorful dish made by simmering ground beef, beans, corn, and tomatoes with a blend of spices. The soup develops a thick, comforting consistency with a rich, tomato-based broth and a medley of textures from the chopped vegetables and tender meat. It is typically served hot, often topped with cheese, sour cream, or fresh herbs.
    Prep Time 10 minutes
    Cook Time 30 minutes
    Total Time 40 minutes
    Servings: 6
    Course: Main Course
    Cuisine: American
    Calories: 250

    Ingredients
      

    • 1 lb ground beef or turkey for leaner option
    • 1 medium onion diced
    • 3 cloves garlic minced
    • 1 can (14 oz) diced tomatoes undrained
    • 1 can (15 oz) black beans drained and rinsed
    • 1 can (15 oz) corn kernels drained
    • 2 cups beef broth
    • 2 tsp chili powder
    • 1 tsp cumin
    • to taste salt and pepper

    Equipment

    • Large pot or Dutch oven
    • Wooden spoon or spatula

    Method
     

    1. Heat a large pot over medium heat and add the ground beef, breaking it apart with a wooden spoon as it cooks until browned and no longer pink, about 5-7 minutes.
    2. Add the diced onion to the beef and sauté until translucent and fragrant, about 3-4 minutes.
    3. Stir in the minced garlic and cook for another 1 minute until it becomes fragrant.
    4. Pour in the diced tomatoes with their juices, stirring to combine and loosen any browned bits from the bottom of the pot.
    5. Add the drained black beans, corn, beef broth, chili powder, and cumin. Stir well to incorporate all the ingredients evenly.
    6. Bring the mixture to a boil, then reduce the heat to low and let it simmer uncovered for about 20-25 minutes, stirring occasionally, until the soup thickens slightly and flavors meld.
    7. Taste the soup and season with salt and pepper as needed, adjusting the spice levels to your preference.
    8. Serve the hot Taco Soup in bowls, garnished with your favorite toppings like shredded cheese, sour cream, or chopped cilantro if desired.

    As the pot simmers, the scent of cumin and chili powder mingles, creating a cozy anticipation. This taco soup isn’t just about satisfying hunger; it’s about creating moments of joy and nostalgia around the table. The easiest recipes often become the most treasured, especially when they come together so effortlessly.

    Next time you need a quick, comforting dinner, remember this dish. It’s adaptable, flavorful, and guaranteed to warm everyone’s spirits. Sometimes, all you need is a spoonful of spicy, meaty goodness to turn the day around.

  • Monster Burgers That Creepy-Crawl from the Grill!

    Monster Burgers That Creepy-Crawl from the Grill!

    Halloween is the perfect time to embrace the wild side of cooking. These Monster Burgers turn a simple meal into a spooky spectacle, with monster faces made from playful toppings and gooey cheese. The smell of sizzling beef and melting cheese fills the air with a cozy yet chaotic vibe, reminiscent of childhood costume parties.

    What makes these burgers truly special isn’t just their creepy appearance—it’s the joy of crafting something a little outrageous. Kids and adults alike will be captivated by how these monster mashups magically come together. Plus, they’re surprisingly easy to assemble after a long day of pumpkin carving and candy collecting.

    Monster Burgers

    Monster Burgers are playful, visually striking sandwiches made with seasoned beef patties topped with melted cheese and creative, spooky toppings to resemble monster faces. They are assembled by cooking the beef until browned and juicy, then garnished with playful toppings to create a fun, creepy appearance with a hearty, chewy texture. The final dish features crispy edges and gooey cheese, perfect for festive occasions.
    Prep Time 15 minutes
    Cook Time 15 minutes
    Total Time 30 minutes
    Servings: 4
    Course: Main Course
    Cuisine: American
    Calories: 600

    Ingredients
      

    • 1 pound ground beef preferably 80/20 for juiciness
    • 4 slices cheddar cheese slices for melting on burgers
    • 4 buns burger buns preferably soft sesame or brioche
    • 1 cup lettuce leaves for topping
    • 1 medium tomato sliced for topping
    • 0.5 cup pickles sliced for topping
    • 1 small onion sliced for topping
    • to taste salt and pepper for seasoning meat
    • small handful black olives cut into small rounds for eyes and mouth
    • red and green bell peppers bell peppers sliced or cut into shapes for hair and accents
    • optional ketchup or mustard for extra monster details

    Equipment

    • Grill or Frying Pan
    • Spatula
    • Slicing Knife
    • Cutting board

    Method
     

    1. Preheat your grill or frying pan over medium-high heat. Shape the ground beef into four equal-sized patties, pressing lightly to form a consistent thickness.
      1 pound ground beef
    2. Season each patty generously with salt and pepper on both sides to enhance flavor.
      to taste salt and pepper
    3. Place the patties on the hot grill or pan, cooking for about 4-5 minutes on each side until they develop a nice brown crust and are cooked to your preferred doneness. During the last minute, top each patty with a slice of cheddar cheese to melt.
      1 pound ground beef, 4 slices cheddar cheese
    4. While the burgers cook, slice the buns and lightly toast them, if desired, to add crunch and prevent sogginess.
    5. Prepare your toppings: slice tomatoes, onions, and pickles, and cut the olives and bell peppers into fun shapes or small rounds to resemble eyes, mouths, hair, and monster features.
      1 cup lettuce leaves, 1 medium tomato, 0.5 cup pickles, 1 small onion, small handful black olives, red and green bell peppers bell peppers
    6. Assemble the monsters by placing the cooked beef patties on the bottom buns. Top each patty with a slice of cheese, then add the desired toppings like lettuce, tomato slices, onions, and pickles.
    7. Use small olives and bell pepper pieces to create eyes, mouths, and hair on the burger to give your monster faces a spooky character. Add any additional details like ketchup or mustard for extra fun.
      small handful black olives, red and green bell peppers bell peppers, optional ketchup or mustard
    8. Cap with the top bun and press gently to set the toppings in place. Arrange your monster burgers on a serving plate and get ready to serve this spooky, delicious feast!

    Notes

    Feel free to get creative with the monster features and toppings. Using skewers or toothpicks can help stabilize small decorative elements.

    As the last bits of cheese drip and the monsters smile (or sneer), you realize how dishwashing chaos wasn’t so scary after all. These burgers add a burst of fun that makes every bite memorable, even after the ghosts and goblins have gone home. They’re a playful reminder that food can be both tasty and a little bit spooky.

    Whether you’re hosting a haunted dinner or just craving some festive comfort food, these Monster Burgers are your creepy-craving answer. They transform a simple grilled favorite into a Halloween masterpiece, all without needing magic spells. Now, it’s time to gather your ingredients and summon your inner monster chef.

  • Unlocking the Secret to a Deep, Smoky Chili Without a Grill

    Unlocking the Secret to a Deep, Smoky Chili Without a Grill

    And in a season where cozy, hearty dishes become essential, this chili feels like a warm hug after a long day. The rich aroma, the tender beans, and the slightly spicy kick make it perfect for sharing with friends or family. It’s become my go-to recipe when I crave something hearty yet quick to prepare.

    Hearty Bean Chili

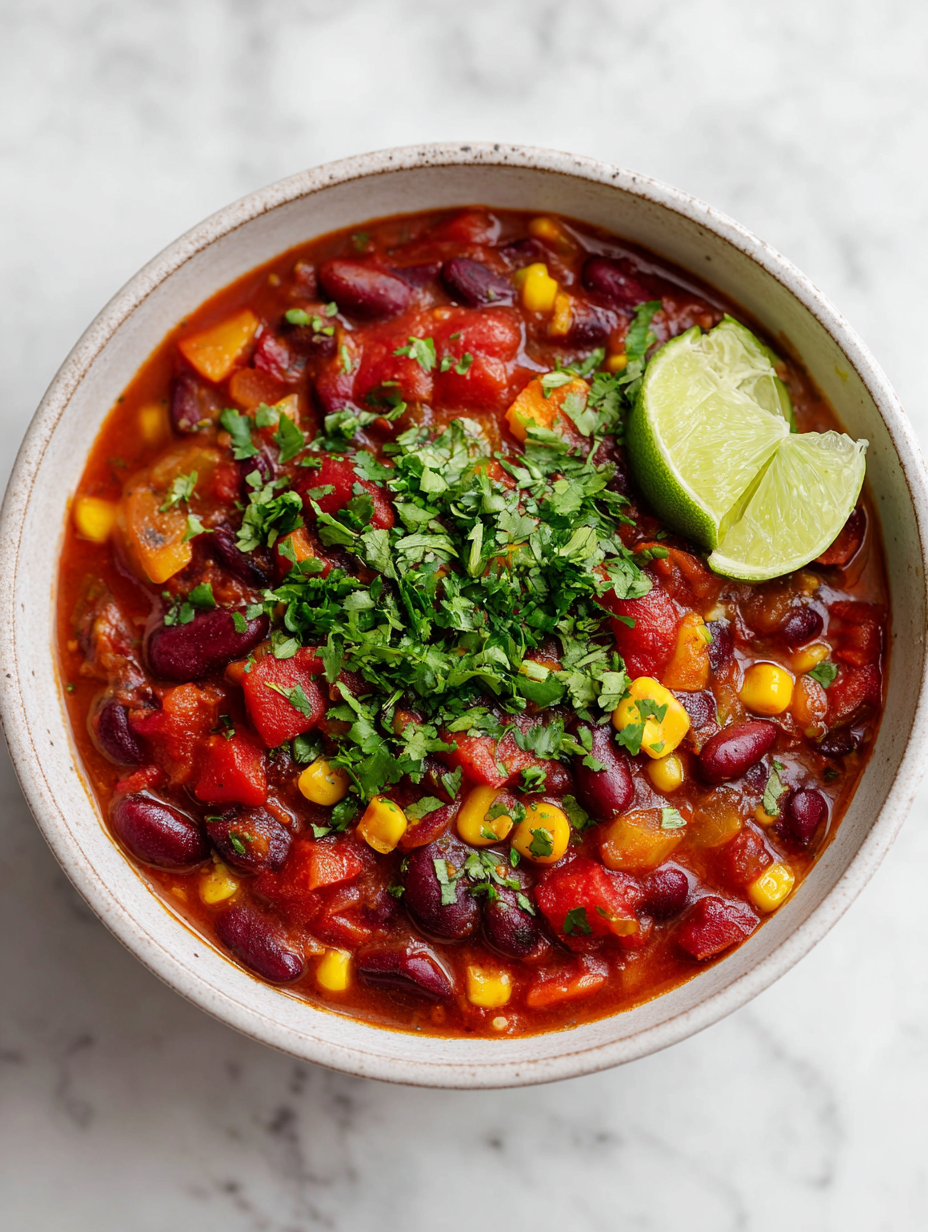
    This bean chili is made by simmering seasoned beans, tomatoes, and aromatics to develop a thick, hearty sauce. The dish features tender beans and a slightly spicy, flavorful broth, resulting in a comforting and robust finish. Its rustic appearance showcases a rich, steaming bowl packed with ingredients and vibrant seasonings.
    Prep Time 10 minutes
    Cook Time 30 minutes
    Total Time 40 minutes
    Servings: 4
    Course: Main Course
    Cuisine: American
    Calories: 250

    Ingredients
      

    • 2 cups dried beans (such as kidney, black, or pinto) soaked overnight or quick-soaked
    • 1 tablespoon olive oil for sautéing
    • 1 large onion chopped
    • 3 cloves garlic minced
    • 1 can (14 oz) diced tomatoes with juices
    • 2 cups vegetable broth or chicken broth
    • 1 teaspoon cumin ground
    • 0.5 teaspoon chili powder adjust to taste
    • Salt to taste salt
    • Freshly ground black pepper to taste black pepper

    Equipment

    • Large pot or Dutch oven
    • Wooden spoon or spatula

    Method
     

    1. Start by rinsing your soaked beans and setting them aside.
    2. Heat a large pot over medium heat and add the olive oil, allowing it to warm up and shimmer.
    3. Drop in the chopped onion and sauté until it becomes translucent and fragrant, about 5 minutes, with a gentle sizzle and mild browning edges.
    4. Add the minced garlic to the pot and cook for another 30 seconds until fragrant, releasing a warm, savory aroma.
    5. Pour in the diced tomatoes along with their juices, stirring to combine with the sautéed aromatics, while the mixture bubbles and thickens slightly.
    6. Stir in the rinsed beans, vegetable broth, cumin, chili powder, salt, and black pepper, then bring the mixture to a gentle boil.
    7. Reduce the heat to low, cover the pot, and let everything simmer for about 25 minutes, allowing the beans to become tender and the flavors to meld, with occasional stirrings.
    8. Remove the lid and taste the chili, adjusting the seasoning with more salt or chili powder if desired, until it’s flavorful and just slightly spicy.
    9. Serve the chili hot, garnished with your favorite toppings like cheese, sour cream, or fresh herbs for added richness.
    Whenever I make this, I appreciate how a little creativity turns everyday ingredients into something special. It’s less about perfection and more about the joy of cooking. Now, every spoonful feels like a small victory, warming both the stomach and the soul.

  • Spooky Delight: The Haunted Mummy Pizza

    Spooky Delight: The Haunted Mummy Pizza

    Halloween is the perfect time to get a little creative in the kitchen. This year, I wanted to transform a simple pizza into a whimsically spooky treat that catches both eyes and noses. The smell of melting cheese and sizzling crust, combined with playful mummy bandages made from tape, makes every bite a fun surprise.

    What I love most about this recipe is how easily it balances chaos and charm. It’s a child’s delight and a grown-up challenge—perfect for a family feast or a spooky party. Plus, it turns everyday ingredients into a costume party for your taste buds.

    **WHY I LOVE THIS RECIPE?**

    • The playful design sparks nostalgic smiles from childhood Halloweens.
    • It’s quick, with minimal clean-up—it’s my chaotic kitchen’s best friend.
    • The combination of crispy crust, gooey cheese, and fun decorations never fails to impress.
    • It’s adaptable: add extra toppings or keep it simple—your call.

    **AVOID MY DISASTER (You’re Welcome)**

    • FORGOT to watch the oven? Cheese burnt black. Douse with sauce and cover with extra cheese.
    • DUMPED hot cheese on my lap? Wiped it off, then quick spread more on the pizza. Burning smell—gone!
    • OVER‑TORCHED the edges? Scrape off the black bits, then brush with a little butter for shine.
    • MISSED a step? Always double-check your bandage strips are cut before baking. No one wants crunchy tape.

    **QUICK FIXES THAT SAVE YOUR DAY**

    • When cheese isn’t spreading well, splash a little olive oil for smooth melting.
    • Patch a broken crust with extra dough or bread crumbs to keep it sturdy.
    • Shield edges with foil if they start to brown too fast.
    • If cheese looks dull, sprinkle a touch of grated Parmesan for shimmer and flavor.
    • When in doubt, keep a spray bottle nearby to dampen any dry, cracking spots.

    Spooky Mummy Pizza

    This dish features a baked pizza topped with melted cheese and creatively arranged strips to resemble a mummy. The pizza is baked until crispy and gooey, with playful tape-like bands made from tape for decoration, resulting in a whimsical, eye-catching final appearance.
    Prep Time 15 minutes
    Cook Time 15 minutes
    Total Time 30 minutes
    Servings: 4
    Course: Main Course
    Cuisine: Halloween
    Calories: 250

    Ingredients
      

    • 1 pre-made or homemade pizza dough enough for a 12-inch pizza
    • 1 cup cup shredded mozzarella cheese for topping
    • 1/4 cup cup pizza sauce spread over crust
    • 4 large hot dogs for mummy bandages
    • tape double-sided tape or edible

    Equipment

    • Baking sheet
    • Oven
    • Kitchen scissors
    • Rolling pin
    • Baking parchment or a silicone baking mat

    Method
     

    1. Preheat your oven to 400°F (200°C). Roll out the pizza dough on a lightly floured surface into a 12-inch circle, then transfer it to a baking sheet lined with parchment or a silicone mat.
    2. Spread the pizza sauce evenly over the dough, leaving a small border around the edges for the crust. Sprinkle the shredded mozzarella cheese generously over the sauce, covering the entire surface.
    3. Place the pizza in the oven and bake for about 12-15 minutes, or until the crust is golden and the cheese is bubbly and slightly browned. Meanwhile, slice the hot dogs into thin strips to resemble mummy bandages.
    4. Remove the baked pizza from the oven and let it cool slightly for 2-3 minutes. Arrange the hot dog strips in strips across the pizza, leaving space for ‘eyes’ to be added later.
    5. Using scissors, cut small pieces of tape to mimic bandage strips. Carefully attach these to the hot dog strips to create a wrapped, mummy-like appearance. Alternatively, if using edible strips, place them directly onto the hot dogs.
    6. Optionally, add two small dots of cheese or olives as eyes at the head of the mummy for a spooky effect. Serve the pizza warm and enjoy its playful look and cheesy aroma.

    Notes

    Ensure the tape is food-safe if using edible tape. Adjust baking time if your crust is thicker or thinner. For a fun variation, decorate with additional Halloween-themed toppings.
    This Halloween-themed pizza isn’t just about fun and visuals—it’s a reminder that the simplest ingredients can become something memorable. The crunch of the crust, the cheesy aroma, and the quirky mummy bandages make it the centerpiece of the table.