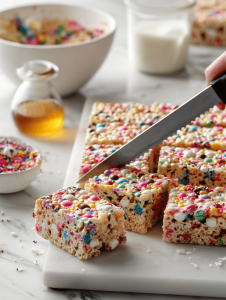
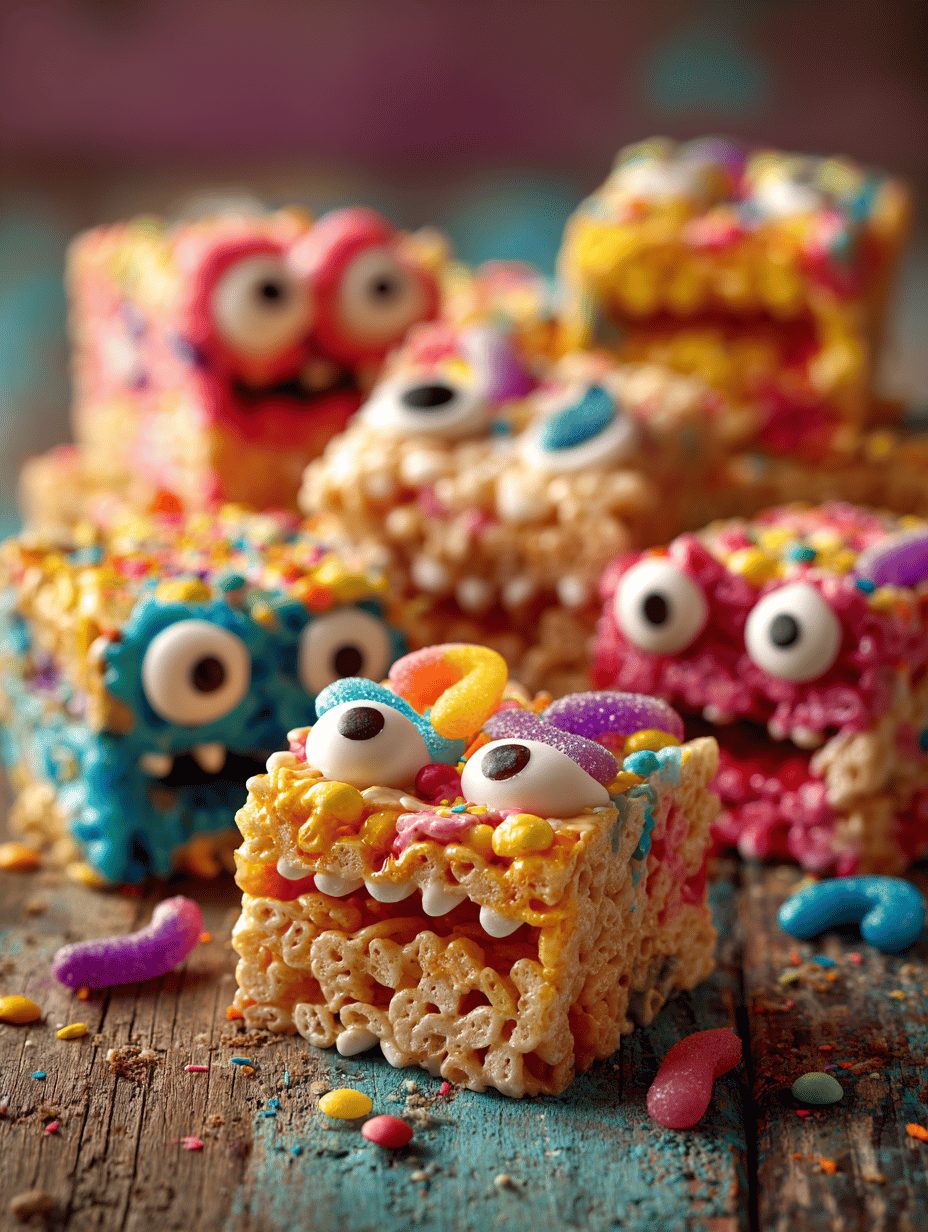
Monster Rice Krispie Treats aren’t your average snacks. They’re a messy, colorful, chewy playground for your taste buds, born from a love of chaos and crunch. Perfect for when you want to turn a simple treat into a wild, edible experiment.
This recipe is all about embracing the gooey mess, using bold flavors and textures to make something memorable. It’s a nostalgic nod, but with a monster-sized twist—think big, think bold, think fun.
Why I keep coming back to this recipe
Because it’s unpredictable and fun. The mess, the stretch, the crunch—every bite feels like a mini chaos festival. Plus, it’s endlessly customizable, so I never get bored. It’s the treat I turn to when I want to make something simple, but with a wild, monster-sized twist.
Inside the monster mix: ingredients that make it special
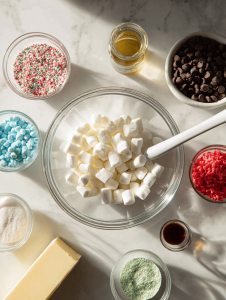
- Mini marshmallows: The gooey core that keeps everything sticky and sweet. Swap with vegan marshmallows if needed.
- Butter: Adds richness and helps everything stick. Substitute with coconut oil for a dairy-free version.
- Cereal (Rice Krispies): The crispy backbone. Any puffed rice or cornflakes can work in a pinch.
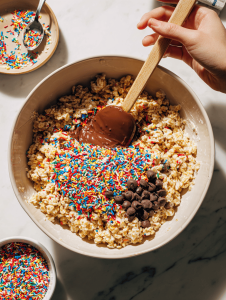
- Add-ins (sprinkles, chocolate chips): Personalize with chaos—more color, more flavor. Use chopped nuts for crunch.
- Vanilla extract: A splash for depth. Skip if you prefer a pure marshmallow flavor.
- Salt: A pinch enhances sweetness and balances flavors. Don’t skip this tiny rebel.
- Food coloring (optional): For that monster vibe—go wild with neon hues or pastel shades.
Tools of the trade for monster Krispies
- Large saucepan: Melting butter and marshmallows evenly.
- Spatula: Stirring and pressing the mixture into the pan.
- 9×13 inch pan: Holding the treats as they set.
- Wax paper or silicone spatula: Smoothing the top and spreading the mixture.
Step-by-step guide to monster-sized Krispie treats
Step 1: Gather your ingredients and equipment before you start. It’s chaos-free when everything’s at hand.
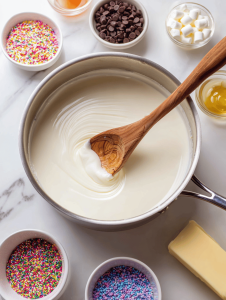
Step 2: Melt butter in a large saucepan over medium heat, about 2 minutes, until it’s bubbly and golden.
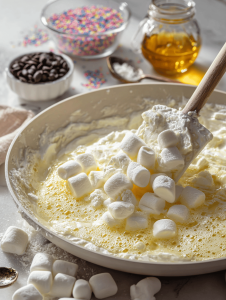
Step 3: Add mini marshmallows to the butter, stirring constantly until fully melted and gooey.
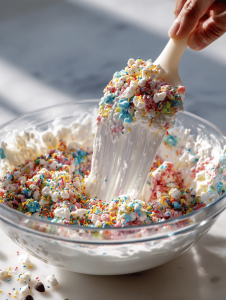
Step 4: Pour in the cereal and stir quickly to coat everything evenly. Keep the heat moderate, around 150°C / 300°F.
Step 5: Press the mixture into a greased pan, smoothing the top with a spatula or wax paper.
Step 6: Allow the treats to cool at room temperature for at least 30 minutes before cutting.
Crisis control: cooking checkpoints and tips
- The marshmallow mixture should be shiny and smooth, not clumpy.
- The cereal should be fully coated but not soggy—remove from heat once coated.
- The press into the pan should be firm, but not overly compressed—light and airy is better.
Avoid these Krispie catastrophes
- Burnt marshmallow mixture.? Use low to medium heat when melting marshmallows to prevent burning.
- Treats being dense and hard.? Press firmly but gently into the pan for a light, airy texture.
- Mixture sticking to your hands.? Add a little butter to your hands or spatula when pressing in to prevent sticking.
- Lumpy, uneven melting.? If marshmallows don’t melt smoothly, lower heat and keep stirring.
Monster Rice Krispie Treats
Ingredients
Equipment
Method
- Gather all your ingredients and equipment — this makes the process smooth and chaos-free.
- Melt the butter in a large saucepan over medium heat, listening for a gentle bubbling and smelling a warm, buttery aroma. Stir occasionally until fully melted and slightly golden.
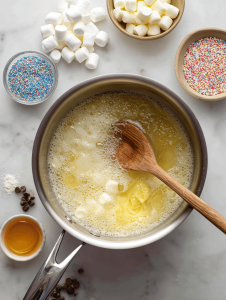
- Add the mini marshmallows to the melted butter, stirring constantly. Watch as they melt into a shiny, gooey mixture that stretches and bubbles softly, filling the air with a sweet scent.
- Once the marshmallows are completely melted and smooth, remove the pan from heat. Stir in the vanilla extract and a pinch of salt for added flavor.
- Pour the cereal into the marshmallow mixture. Use a spatula to quickly fold and coat the cereal evenly, maintaining a sticky, textured consistency with some bits sticking together and others still fluffy.
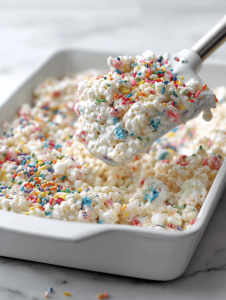
- Mix in the colorful sprinkles and chocolate chips, pressing them gently into the mixture to distribute the chaos and add bursts of color and flavor.
- Transfer the mixture into a greased 9x13 inch pan. Use wax paper or a spatula to press down gently, smoothing the top while keeping the treats light and airy.
- Let the treats cool at room temperature for at least 30 minutes, allowing the sticky mixture to set into a firm, chewy block with a colorful, textured surface.
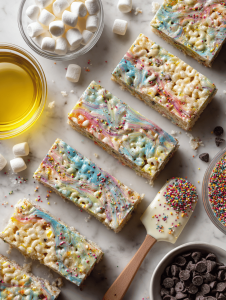
- Once cooled, cut into squares or fun shapes to reveal the vibrant, chewy, crispy interior that’s ready to enjoy. Serve and savor the chaos!