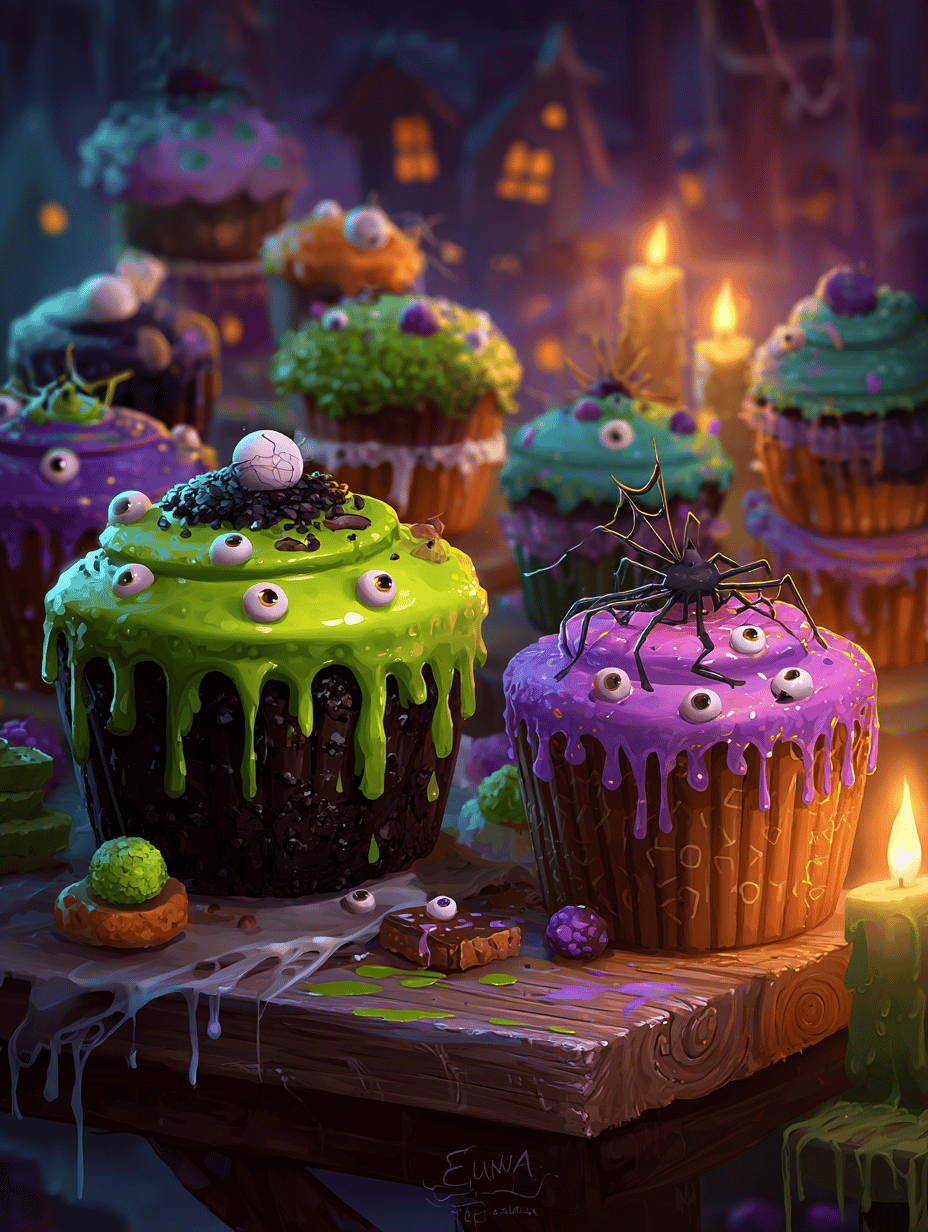
Sometimes, the best way to celebrate a holiday—or just break the monotony—is with a little mischief in the kitchen. These spooky cupcakes started as a fun experiment in turning familiar treats into something delightfully eerie. They’re perfect for parties, or even just a lazy weekend when you want to surprise someone with a treat that’s both creepy and delicious.
Why These Cupcakes Keep My Kitchen Haunted
They’re a chance to forget the world for a bit and get creative. Each spooky detail makes me smile, and the kids go wild for the surprise faces. Plus, baking these is as much about the chaos and giggles as the final bite. They remind me that sometimes, a little spooky magic in the kitchen can turn an ordinary day into a story worth telling.
Spooky Cupcake Ingredients Breakdown
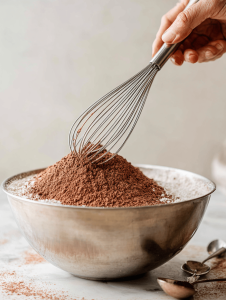
- Dark cocoa powder: Gives that rich, smoky flavor and deep color—look for Dutch-processed for best results.
- Buttermilk: Adds moisture and a slight tang; swap with regular milk plus a splash of lemon if needed.
- Black food coloring: For that eerie, midnight hue—use gel for intensity without thinning batter.
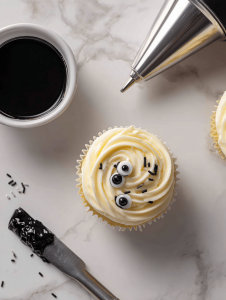
- Edible eyes or creepy sprinkles: Finish your look with fun, spooky decorations that delight and surprise.
- Vanilla extract: A splash brightens flavors—use real vanilla for that warm, inviting aroma.
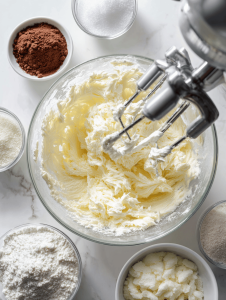
- Butter: Creamy and rich, helps create a tender crumb—unsalted is best for control.
- Sugar: For sweetness and moisture—brown sugar adds a hint of caramel.
Tools of the Spooky Trade
- Mixing bowls: For blending your dry and wet ingredients.
- Electric mixer: To get that fluffy butter-sugar mixture and smooth batter.
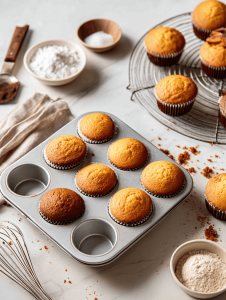
- Cupcake tin: Holds the liners and helps shape the cupcakes.
- Cooling rack: Makes sure cupcakes cool evenly and quickly.
- Decorating spatula: For spreading icing smoothly and creating creepy designs.
Step-by-step to spine-chilling cupcakes
Step 1: Preheat your oven to 180°C (350°F).
Step 2: Line a muffin tin with dark, eerie cupcake liners.
Step 3: Mix your dry ingredients: flour, cocoa powder, baking soda, a pinch of salt.
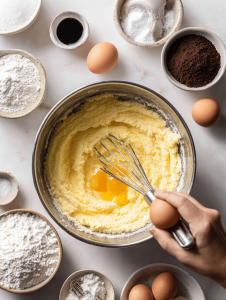
Step 4: Cream butter and sugar until fluffy, about 3 minutes.
Step 5: Add eggs one at a time, beating well after each. Stir in vanilla.
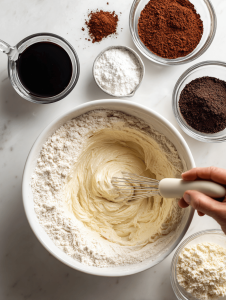
Step 6: Alternate adding buttermilk and dry ingredients, starting and ending with flour.
Step 7: Fill cupcake liners about 2/3 full with batter.
Step 8: Bake for 20-22 minutes. The tops should spring back when lightly pressed.
Step 9: Cool cupcakes in tin for 10 minutes, then transfer to a wire rack.
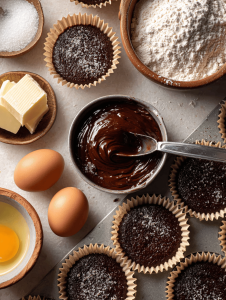
Step 10: Decorate with spooky icing, edible eyes, or creepy sprinkles.
Creepy Cooking Checkpoints & Tips
- Ensure batter isn’t over-mixed; it can lead to dense cupcakes.
- Look for a toothpick inserted in the center to come out clean.
- Watch the edges of cupcakes; they should be slightly darker and crusty.
- Cool completely before decorating to avoid melting your spooky icing.
Spooky Mishaps & How to Fix Them
- Lumpy batter due to uneven mixing.? ADD MORE MIXING TIME if batter is lumpy.
- Cupcakes sinking or collapsing.? DON’T OPEN the oven door early; cupcakes may sink.
- Undercooked centers.? PROBE with a toothpick if unsure; don’t rely solely on appearance.
- Dry, crumbly cupcakes.? IF cupcakes are too dry, reduce baking time slightly next round.
Spooky Halloween Cupcakes
Ingredients
Equipment
Method
- Preheat your oven to 180°C (350°F) and line your cupcake tin with dark, eerie liners.
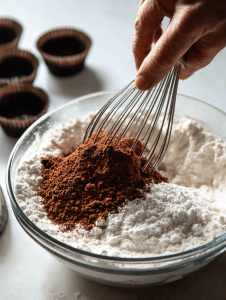
- In a large mixing bowl, whisk together the flour, cocoa powder, baking soda, and salt until combined and free of lumps.
- In another bowl, cream the softened butter and sugar together using an electric mixer on medium speed until the mixture is light, fluffy, and pale, about 3 minutes. This creates a tender crumb base.
- Add eggs one at a time to the butter-sugar mixture, beating well after each addition. Stir in the vanilla extract for a warm aroma.
- Mix the buttermilk with the black food coloring drops, stirring until the color is evenly distributed, resulting in a dark, midnight hue.

- Alternate adding the dry ingredients and the colored buttermilk to the wet mixture, starting and ending with the dry ingredients. Mix just until combined; do not over-mix to keep the cupcakes light and fluffy.
- Using a spoon or scoop, fill the cupcake liners about 2/3 full with batter, ensuring even distribution for uniform baking.
- Bake in the preheated oven for 20-22 minutes, until the tops are slightly domed and spring back when lightly pressed. Insert a toothpick into the center; if it comes out clean, they are ready.
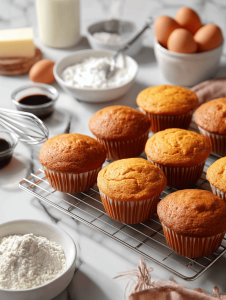
- Remove cupcakes from the oven and let them cool in the tin for about 10 minutes, then transfer to a wire rack to cool completely.
- Once cooled, decorate with spooky icing, edible eyes, or creepy sprinkles using a decorating spatula for a smooth finish and fun, eerie details.
- Enjoy these delightfully creepy cupcakes that are perfect for Halloween parties or a fun, spooky treat to surprise your friends.
