Pumpkin whoopie pies are a bit like a cozy secret—moist, spicy, and a little nostalgic. I love how simple ingredients turn into something special with just a little effort. They remind me of crisp autumn days and baked goods shared over a crackling fire.
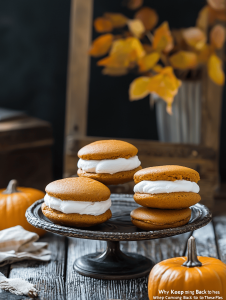
Why I Keep Coming Back to These Pies
They’re imperfectly perfect, filling the kitchen with warm spices and sweet pumpkin aroma. Each bite unlocks a cozy memory, and they never fail to surprise with their soft, spicy punch. They’re quick to assemble but taste like a holiday in every bite, making them my go-to for comfort and celebration alike.
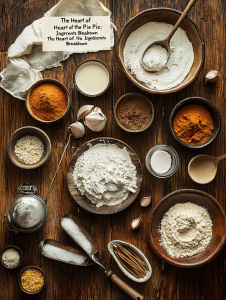
The Heart of the Pie: Ingredients Breakdown
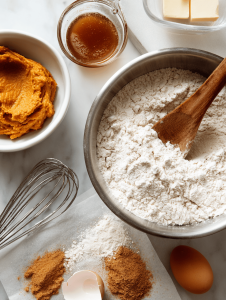
- Pumpkin puree: Gives moistness and deep flavor, like a whisper of earthiness.
- Brown sugar: Adds warmth and slight molasses notes, perfect for fall vibes.
- Spices (cinnamon, ginger): Layered warmth that makes the palate dance, just enough to wake up your senses.
- Butter: Creates richness and tender crumb, melting softly in your mouth.
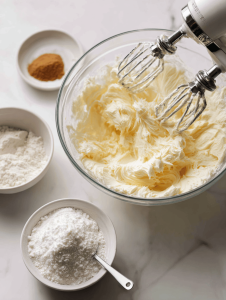
- Cream cheese or mascarpone: For the filling, smooth and tangy, balances sweetness with a bit of zing.
- Eggs: Bind everything together, giving structure to the cookies.
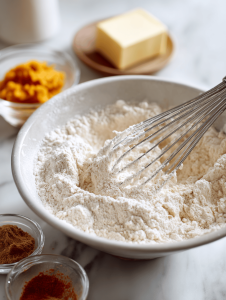
- All-purpose flour: The backbone of the cookie, sturdy yet tender when measured right.
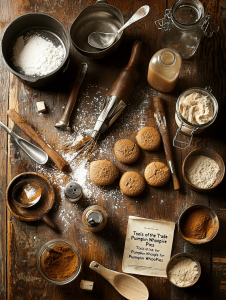
Tools of the Trade for Pumpkin Whoopie Pies
- Mixing bowls: For combining wet and dry ingredients.
- Electric mixer or whisk: To cream butter and sugar evenly.
- Baking sheets: To hold the cookies during baking.
- Parchment paper: Prevent sticking and ensure even baking.
- Cooling rack: To cool cookies without sogginess.
Step-by-step to Pumpkin Perfection
Step 1: Preheat your oven to 180°C (350°F).
Step 2: Line baking sheets with parchment paper.
Step 3: In a large bowl, whisk together flour, baking soda, cinnamon, ginger, and salt.
Step 4: In another bowl, cream softened butter with brown sugar until fluffy, about 2 minutes.
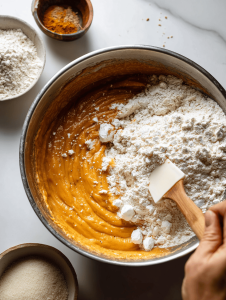
Step 5: Add eggs one at a time, then stir in pumpkin puree and vanilla. Mix until smooth.
Step 6: Gradually add dry ingredients, mixing just until combined.
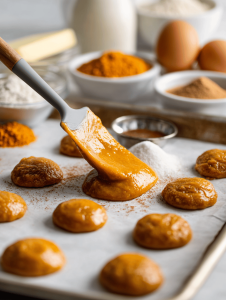
Step 7: Drop spoonfuls of batter onto prepared sheets, spacing them about 2 inches apart.
Step 8: Bake for 12-14 minutes, until edges are golden and tops are set.
Step 9: Let cool on sheets 5 minutes, then transfer to a wire rack to cool completely.
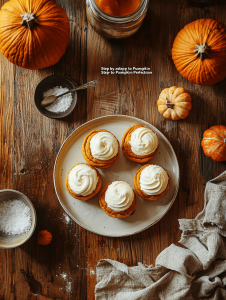
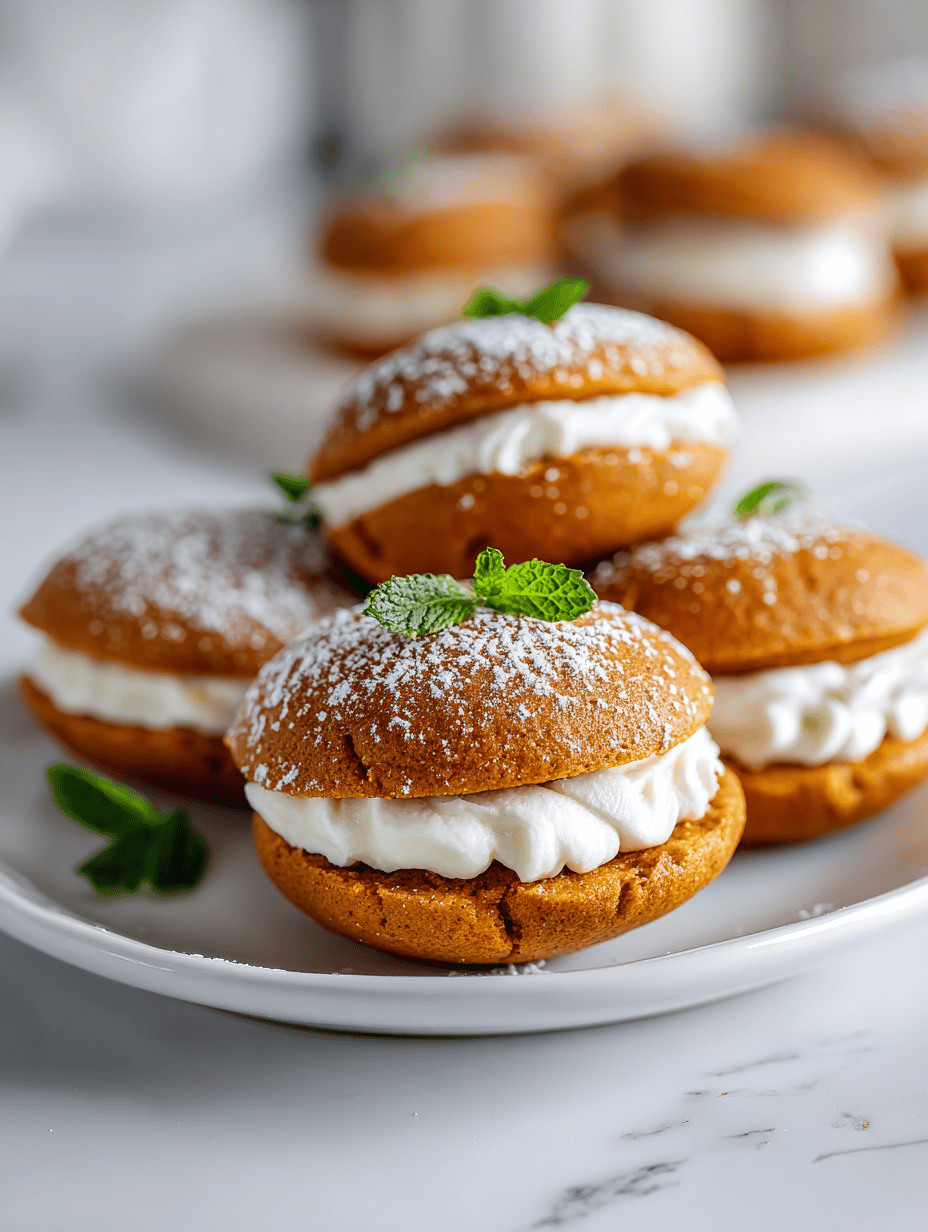
Step 10: Once cooled, spread filling between two cookies to make sandwiches.
Cooking Checkpoints & Tips
- Edges should be golden, not burnt.
- Cookies should be firm but not hard to the touch.
- Filling should be creamy and spreadable, not runny.
- Oven temperature must be accurate for even baking.
Common Mistakes & How to Fix Them
- Tough, dense cookies.? Over-mixing batter → Mix just until ingredients are combined.
- Cookies turning dark or burning.? Baking at too high a temp → Lower oven to 160°C (320°F).
- Flat, spread-out cookies.? Not measuring flour properly → Use spoon and level for accuracy.
- Filling oozing out when assembled.? Filling too runny → Chill filling before spreading.
Pumpkin Whoopie Pies
Ingredients
Equipment
Method
- Preheat your oven to 180°C (350°F) and line baking sheets with parchment paper.
- In a large bowl, whisk together the flour, baking soda, cinnamon, ginger, and salt until evenly combined.
- In a separate bowl, cream together the softened butter and brown sugar using an electric mixer or whisk until the mixture is fluffy and light, about 2 minutes. You should see it turn paler and feel a slight resistance when mixing.

- Add the egg to the butter mixture and beat until fully incorporated, then stir in the pumpkin puree and vanilla extract until the batter looks smooth and slightly thickened.
- Gradually add the dry ingredients to the wet mixture, mixing just until everything is combined. The dough will be soft but scoopable.

- Using a spoon or cookie scoop, drop dollops of dough onto the prepared baking sheets, spacing them about 2 inches apart to allow for spreading.

- Bake in the preheated oven for 12-14 minutes, until the edges are golden and the tops are set with a slight dome. The cookies should feel firm but still soft to the touch.

- Remove the baking sheets from the oven and let the cookies cool on the sheets for about 5 minutes, then transfer them to a wire rack to cool completely. The cookies will firm up as they cool.

- While the cookies cool, prepare the filling by mixing softened cream cheese or mascarpone with powdered sugar until smooth and creamy. Chill the filling briefly if it’s too soft to spread.
- Once the cookies are cool, spread a generous layer of the creamy filling onto the flat side of one cookie, then top with a second cookie to form a sandwich. Gently press to spread the filling evenly to the edges.
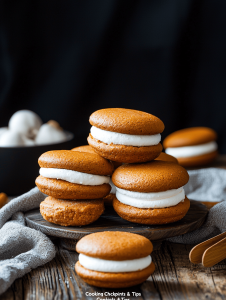
- Repeat with the remaining cookies and filling, then enjoy your soft, spicy pumpkin whoopie pies—perfect for sharing or indulging on a cozy day.