Halloween is about more than costumes; it’s about transforming simple ingredients into something delightfully spooky. This bark isn’t just candy; it’s a playful experiment in flavor, texture, and visual impact. I love how a handful of toppings can turn plain chocolate into a creepy, colorful masterpiece.
Why I keep making this spooky treat
It’s quick to throw together but looks impressive, especially with quirky toppings. I love how it turns simple ingredients into a festive statement. Plus, it’s a chaos-friendly way to satisfy sweet cravings without fuss. The best part—everyone’s always surprised by how good it tastes, even with last-minute improvisations.
Ingredients and their secret roles
- Dark chocolate: Rich, slightly bitter, melts into a glossy, smooth surface—key for that shiny finish.
- Toppings like candied ginger or pretzels: Adds texture and bursts of flavor—think spicy-sweet or salty crunch.
- Edible glitter or sprinkles: A touch of shimmer that enhances the spooky vibe—think shimmer and surprise.
- Sea salt or chili flakes: A pinch heightens flavor contrast—sweet with a little kick.
- Olive oil or coconut oil: Helps smooth out seized chocolate or adds a slight sheen—use sparingly.
Tools that make magic happen
- Double boiler or microwave-safe bowl: Gently melts chocolate without burning.
- Spatula: Spreads melted chocolate evenly.
- Baking sheet: Holds the chocolate for cooling and setting.
- Parchment paper or silicone mat: Prevents sticking and makes cleanup easy.
- Knife or breaker: Breaks the bark into rustic pieces.
Step-by-step to spooky, shiny bark
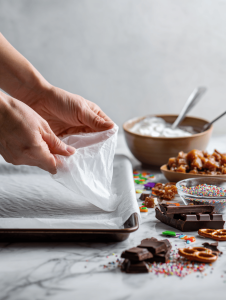
Step 1: Line a baking sheet with parchment paper or a silicone mat.
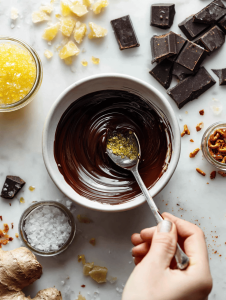
Step 2: Melt dark chocolate in a heatproof bowl over a double boiler or in short bursts in the microwave, stirring every 20 seconds.
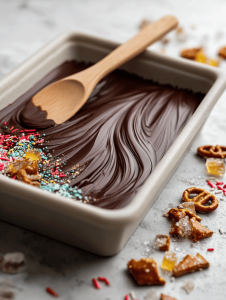
Step 3: Pour melted chocolate onto the prepared sheet. Use a spatula to spread it into an even layer, about 1/4 inch thick.
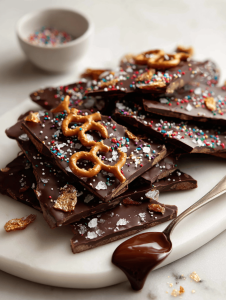
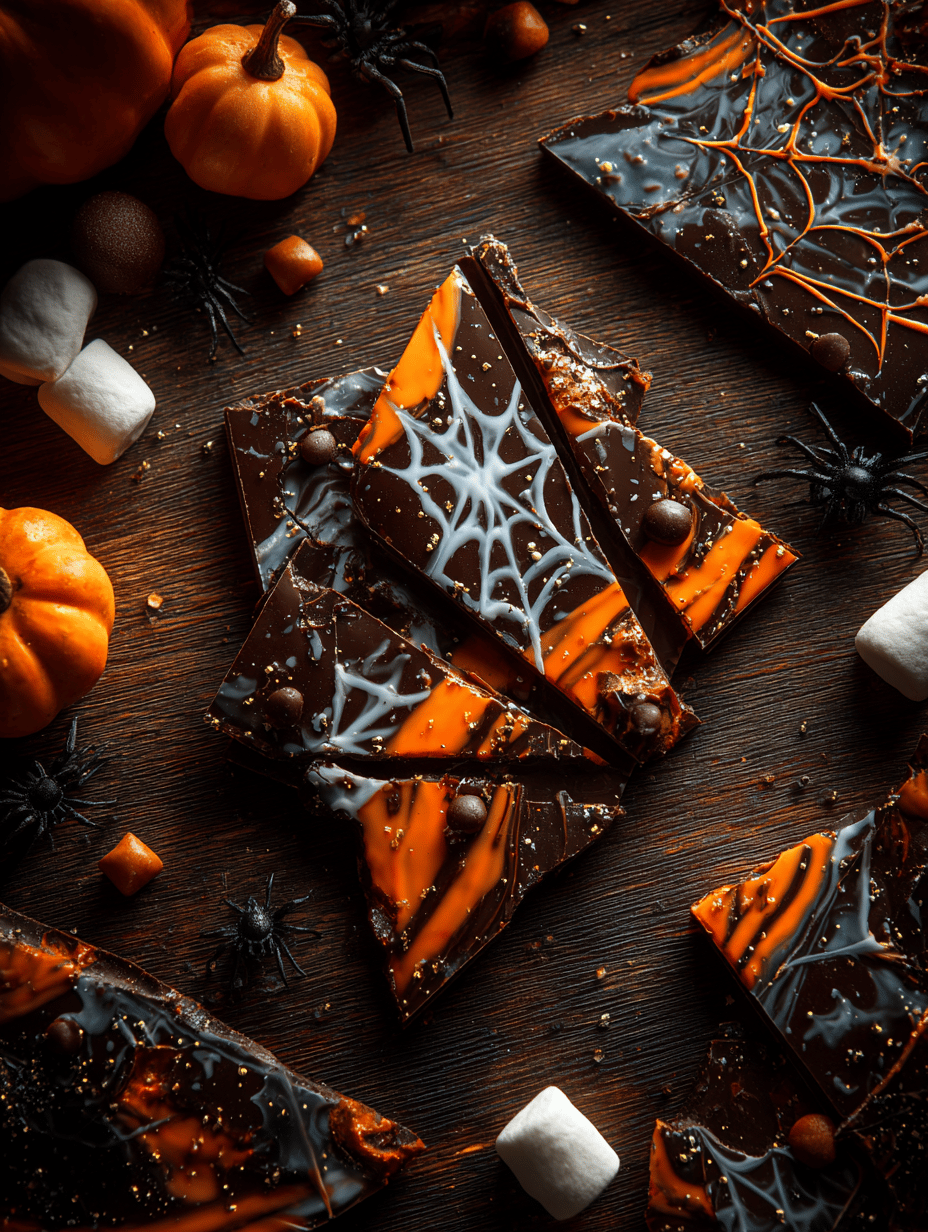
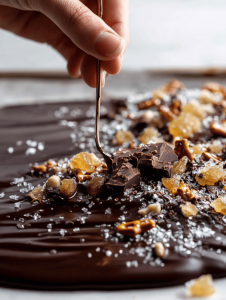
Step 4: While still warm, sprinkle your chosen toppings—think candied ginger, crushed pretzels, or edible glitter—over the surface.
Step 5: Let the bark cool at room temperature for 30 minutes, then refrigerate for at least 20 minutes until firm.
Step 6: Break into jagged pieces with your hands or a knife. Serve in a spooky bowl or scatter on a platter.
Quick tips to get it just right
- Chocolate should be fully melted and smooth, not grainy or lumpy.
- Toppings should be pressed in gently, so they stick as the chocolate cools.
- Watch the chocolate as it melts—overheating can cause it to seize or burn.
- If the chocolate hardens too quickly, rewarm gently, stirring constantly.
- Ensure the bark cools completely before breaking to prevent crumbling.
Common pitfalls and how to rescue them
- Chocolate turns grainy and thick when overheated.? IF the chocolate seizes, add a teaspoon of vegetable oil and stir gently.
- Toppings fall off or don’t stick.? DUMPED toppings too early? Press them in gently after pouring, then chill again.
- Brittle, uneven breaks.? IF the chocolate cracks unevenly, warm briefly to soften before breaking.
- Burnt smell and flavor.? OVER-TORCHED the chocolate? Scrape the burnt bits and melt a fresh batch.
Spooky Chocolate Bark
Ingredients
Equipment
Method
- Line a baking sheet with parchment paper or a silicone mat, creating a smooth surface for the chocolate bark.
- Gently melt the dark chocolate in a double boiler or microwave, stirring every 20 seconds until smooth and glossy, with a fragrant aroma filling the air.
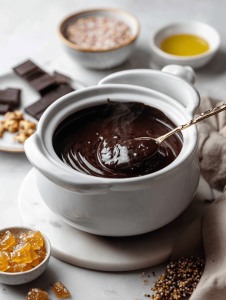
- Add a tablespoon of oil to the melted chocolate and stir well—this ensures it stays smooth and shiny as it cools.
- Pour the melted chocolate onto the prepared baking sheet, then use a spatula to spread it into an even layer about 1/4 inch thick, feeling the smooth, glossy surface beneath your spatula.

- Sprinkle your toppings—candied ginger, crushed pretzels, shimmer sprinkles, and a pinch of sea salt or chili flakes—over the still-warm chocolate, pressing gently to help them stick.
- Let the bark sit at room temperature for about 30 minutes, allowing the chocolate to cool and set with a satisfying crackle when gently pressed.

- Refrigerate the chocolate for at least 20 minutes to ensure it’s fully firm and ready to break into jagged pieces, giving it a rustic, spooky appearance.
- Using a knife or your hands, gently break the bark into uneven, jagged shards—perfect for a festive display.
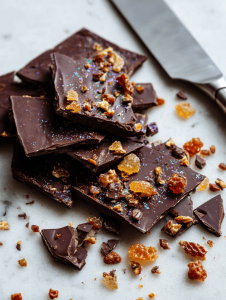
- Arrange the broken pieces on a platter or in a bowl, ready to serve at your Halloween party or spooky gathering.