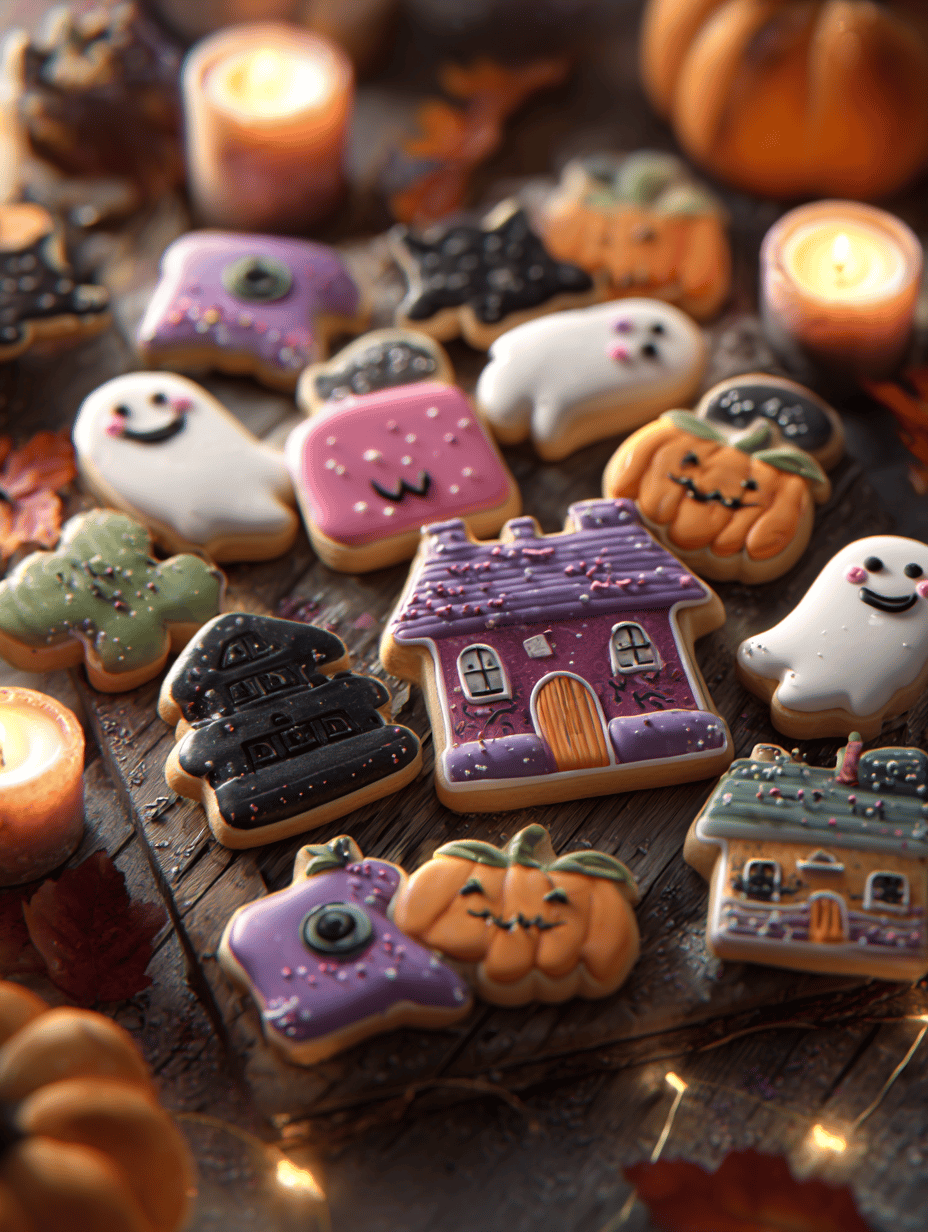
Halloween is the one time I indulge in sugar cookies that aren’t just sweet but have a little eerie fun. These cookies are a canvas for creativity—think ghosts with wiggly eyes or tiny pumpkins with crooked smiles. Baking them feels like a playful ritual, a break from the usual in a season that loves to surprise.
Why I Keep Coming Back to This Recipe
The mix of childhood nostalgia and creative chaos makes these cookies irresistible. Every Halloween, the smell of baking sugar and spice signals a small celebration. They’re imperfect, charming, and always a little different—just like the season itself.
The Ingredients Behind the Magic
- Unsalted butter: Creates a tender, melt-in-your-mouth texture; use room temp for smooth creaming.
- Granulated sugar: Sweetens and helps with browning; opt for superfine for a smoother dough.
- Egg: Adds richness and helps bind the dough; large size is standard.
- Vanilla extract: Lends warmth and depth; use high-quality for a more pronounced flavor.
- All-purpose flour: The base structure; can substitute with gluten-free blend if needed.
- Baking powder: A leavening agent to keep cookies light; avoid overuse to prevent puffiness.
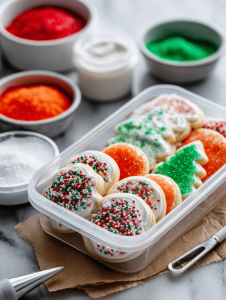
- Colored sugars & icing: For decorating; use gel food colors for vibrant, smear-proof decorations.
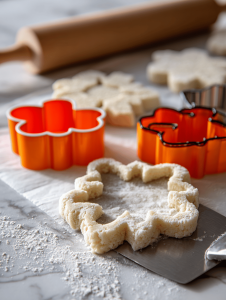
Tools of the Spooky Trade
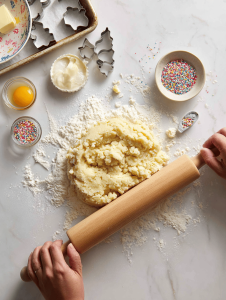
- Rolling pin: To evenly roll out dough to uniform thickness.
- Cookie cutters: To shape the cookies into spooky silhouettes.
- Baking sheets: To provide a flat, even surface for baking.
- Wire rack: To cool cookies evenly and prevent sogginess.
- Piping bags & tips: For decorating with icing and adding spooky details.
Step-by-Step Guide to Perfect Halloween Sugar Cookies with an Unusual Charm
Step 1: Preheat your oven to 180°C (350°F). Line baking sheets with parchment paper. Gather your cookie cutters—think bats, ghosts, or pumpkins.
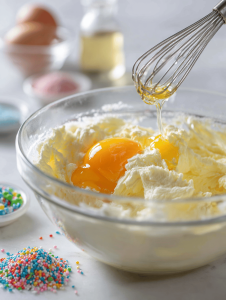
Step 2: Cream together 1 cup (226g) unsalted butter and 1 cup (200g) sugar until light and fluffy, about 3-4 minutes. Add 1 large egg and 1 tsp vanilla extract, beat until combined.
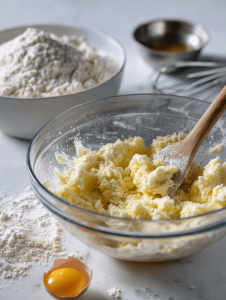
Step 3: In a separate bowl, whisk 2 ½ cups (310g) all-purpose flour, ½ tsp baking powder, and a pinch of salt. Gradually add to the wet ingredients, mixing just until dough forms.
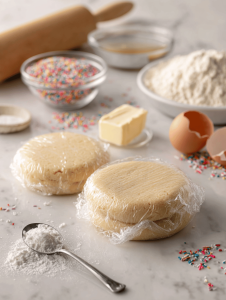
Step 4: Divide dough into two disks, wrap with plastic wrap, and chill for at least 1 hour. Chilling helps the dough hold its shape and makes it easier to roll out.
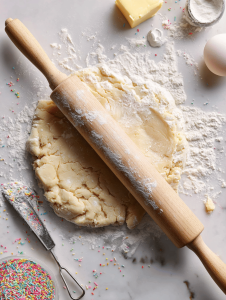
Step 5: Roll out one disk on a lightly floured surface to about ¼ inch thickness. Use cookie cutters to cut out shapes. Transfer to baking sheet, spacing about 2 inches apart.
Step 6: Bake for 8-10 minutes, until edges are just golden. Watch carefully—baking too long makes them crisp and less tender. Let cool for 5 minutes on the sheet, then transfer to a wire rack.
Step 7: Decorate with royal icing, edible glitter, or colored sugars once cooled. For a spooky effect, add some black or orange accents. Let the decorations set before handling.
Step 8: Store in an airtight container at room temperature for up to 3 days, or freeze for longer storage.
Cooking Checkpoints & Tips to Nail It
- Cookies should be firm but tender, not hard or crumbly.
- Edges should be lightly golden; avoid overbaking.
- Dough should be chilled enough to prevent spreading.
- Decorations should set firm without melting or cracking.
Common Mistakes & How to Fix Them
- Cookies flatten too much in the oven.? Use chilled dough to prevent spreading. Warm dough spreads and loses shape.
- Cookies are too crispy or burnt.? Bake in shorter intervals, checking color often. Overbaking makes them crisp.
- Cookies turn out tough.? Don’t overmix the dough to keep it tender. Mix just until combined.
- Shape distortion during baking.? Use precise cookie cutter shapes and press firmly. Soft dough can distort.
Halloween Sugar Cookies
Ingredients
Equipment
Method
- Preheat your oven to 180°C (350°F) and line baking sheets with parchment paper. Gather your cookie cutters—think bats, ghosts, or pumpkins—and have your rolling pin ready.
- In a large bowl, cream together the softened butter and sugar until the mixture is light, fluffy, and smells slightly sweet, about 3-4 minutes. This creates a smooth, pale mixture that forms the base of your dough.
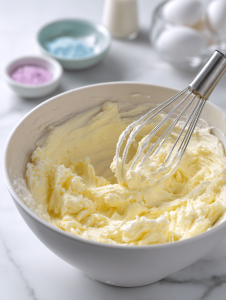
- Add the egg and vanilla extract to the creamed mixture, beating until fully combined. You'll notice the mixture becomes silky and slightly glossy.
- In a separate bowl, whisk together the flour, baking powder, and a pinch of salt. Gradually add this dry mixture to the wet ingredients, mixing just until the dough comes together and feels soft yet manageable.
- Divide the dough into two equal disks, wrap each in plastic wrap, and chill in the refrigerator for at least 1 hour. Chilling helps the dough relax and makes it easier to roll out without sticking.
- Remove one disk from the fridge and place it on a lightly floured surface. Use a rolling pin to roll out the dough to about ¼ inch thickness, maintaining an even surface. The dough should feel firm but pliable as you roll.
- Use your chosen cookie cutters to cut out spooky shapes from the dough. Gently transfer the shaped cookies onto the prepared baking sheet, spacing them about 2 inches apart to allow for slight spreading.
- Bake the cookies in the preheated oven for 8-10 minutes, or until their edges are just golden. Keep a close eye near the end to avoid overbaking, which can make them crisp and less tender. Let the cookies cool on the baking sheet for about 5 minutes before transferring them to a wire rack to cool completely.
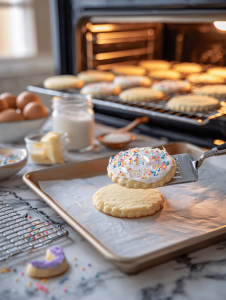
- Once cooled, decorate your cookies with royal icing, colored sugars, or edible glitter. Use piping bags and tips to add spooky details like eyes, smiles, or cobwebs. Allow the decorations to set before handling or stacking.

- Store the decorated cookies in an airtight container at room temperature for up to 3 days, or freeze them for longer storage. Enjoy your festive treats during your Halloween celebration!